Gokyo Ri Trek
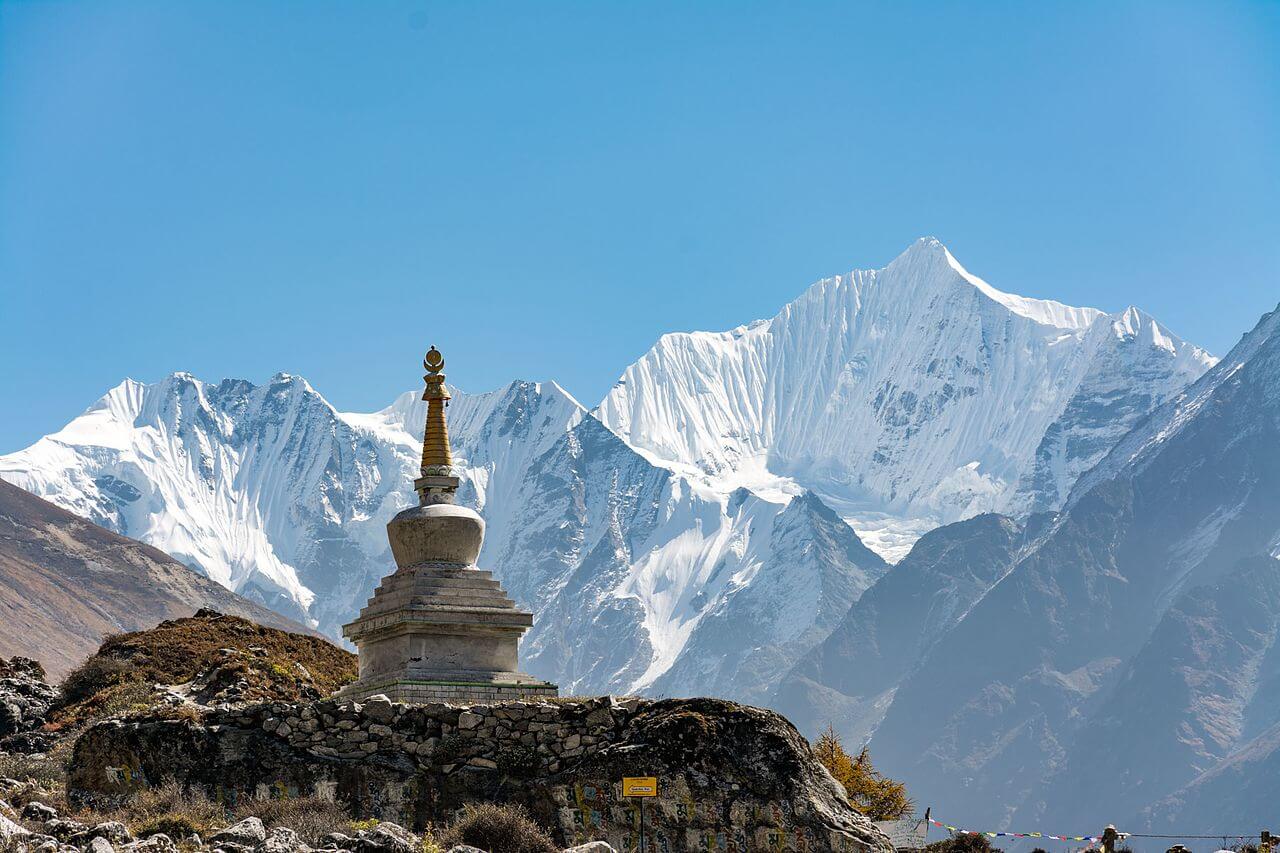
Gokyo Ri Trek, the best alternative trail to the Everest Base Camp Trek, offers exceptional views of the Himalayan peaks along with lakes and glaciers.
Gokyo Ri Trek is a moderate trek in the high Himalayas of the Everest region. Instead of traveling to the more commercial Everest Trek, trekkers often choose this itinerary to enjoy the less crowded trails. It is an excellent choice for both experienced trekkers as well as novice travelers.
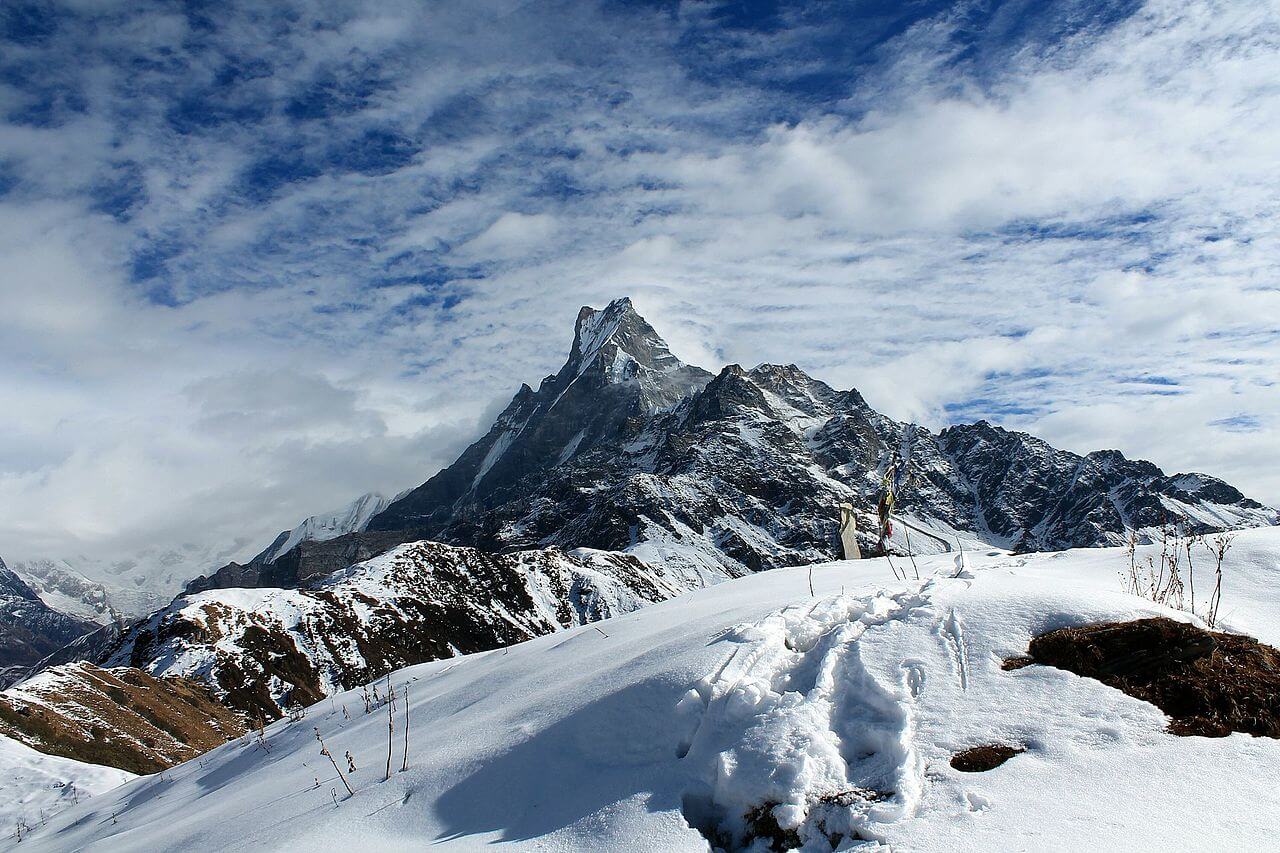
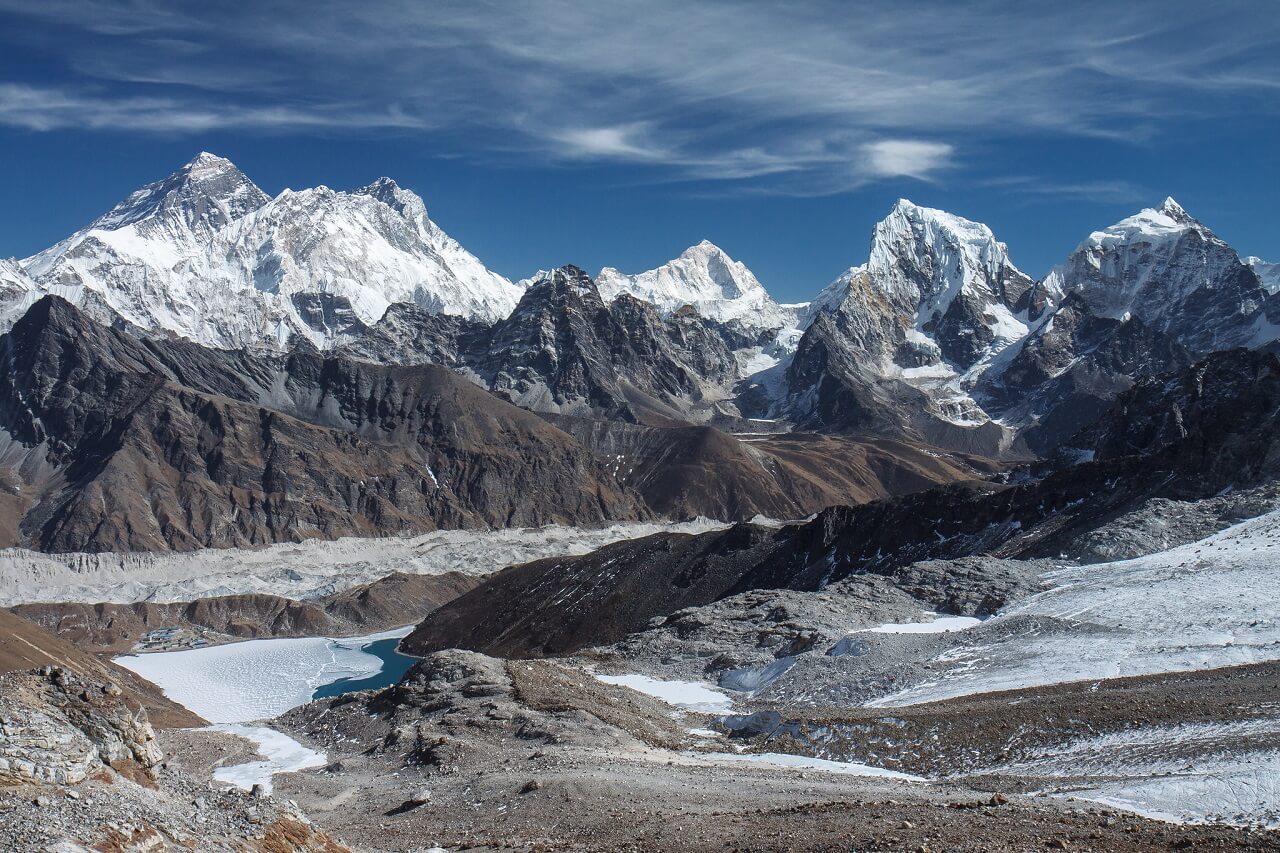
The summit of Gokyo Ri offers panoramic mountain views, including four 8,000m peaks — Mt. Everest, Lhotse, Cho Oyu, and Makalu. Many argue the view from the top of this vantage point is far better than that from the famous Kala Patthar.
Gokyo Ri Trek begins with a scenic flight from Kathmandu to Lukla, one of the most extreme airports in the world. The trail traverses through famous Sherpa villages like Phakding, Namche, and Dole, all the way up to Gokyo Valley. If you have a few additional days, you can also extend Gokyo Ri Trek with the classic Everest Base Camp Trek.
Highlights of Gokyo Ri Trek
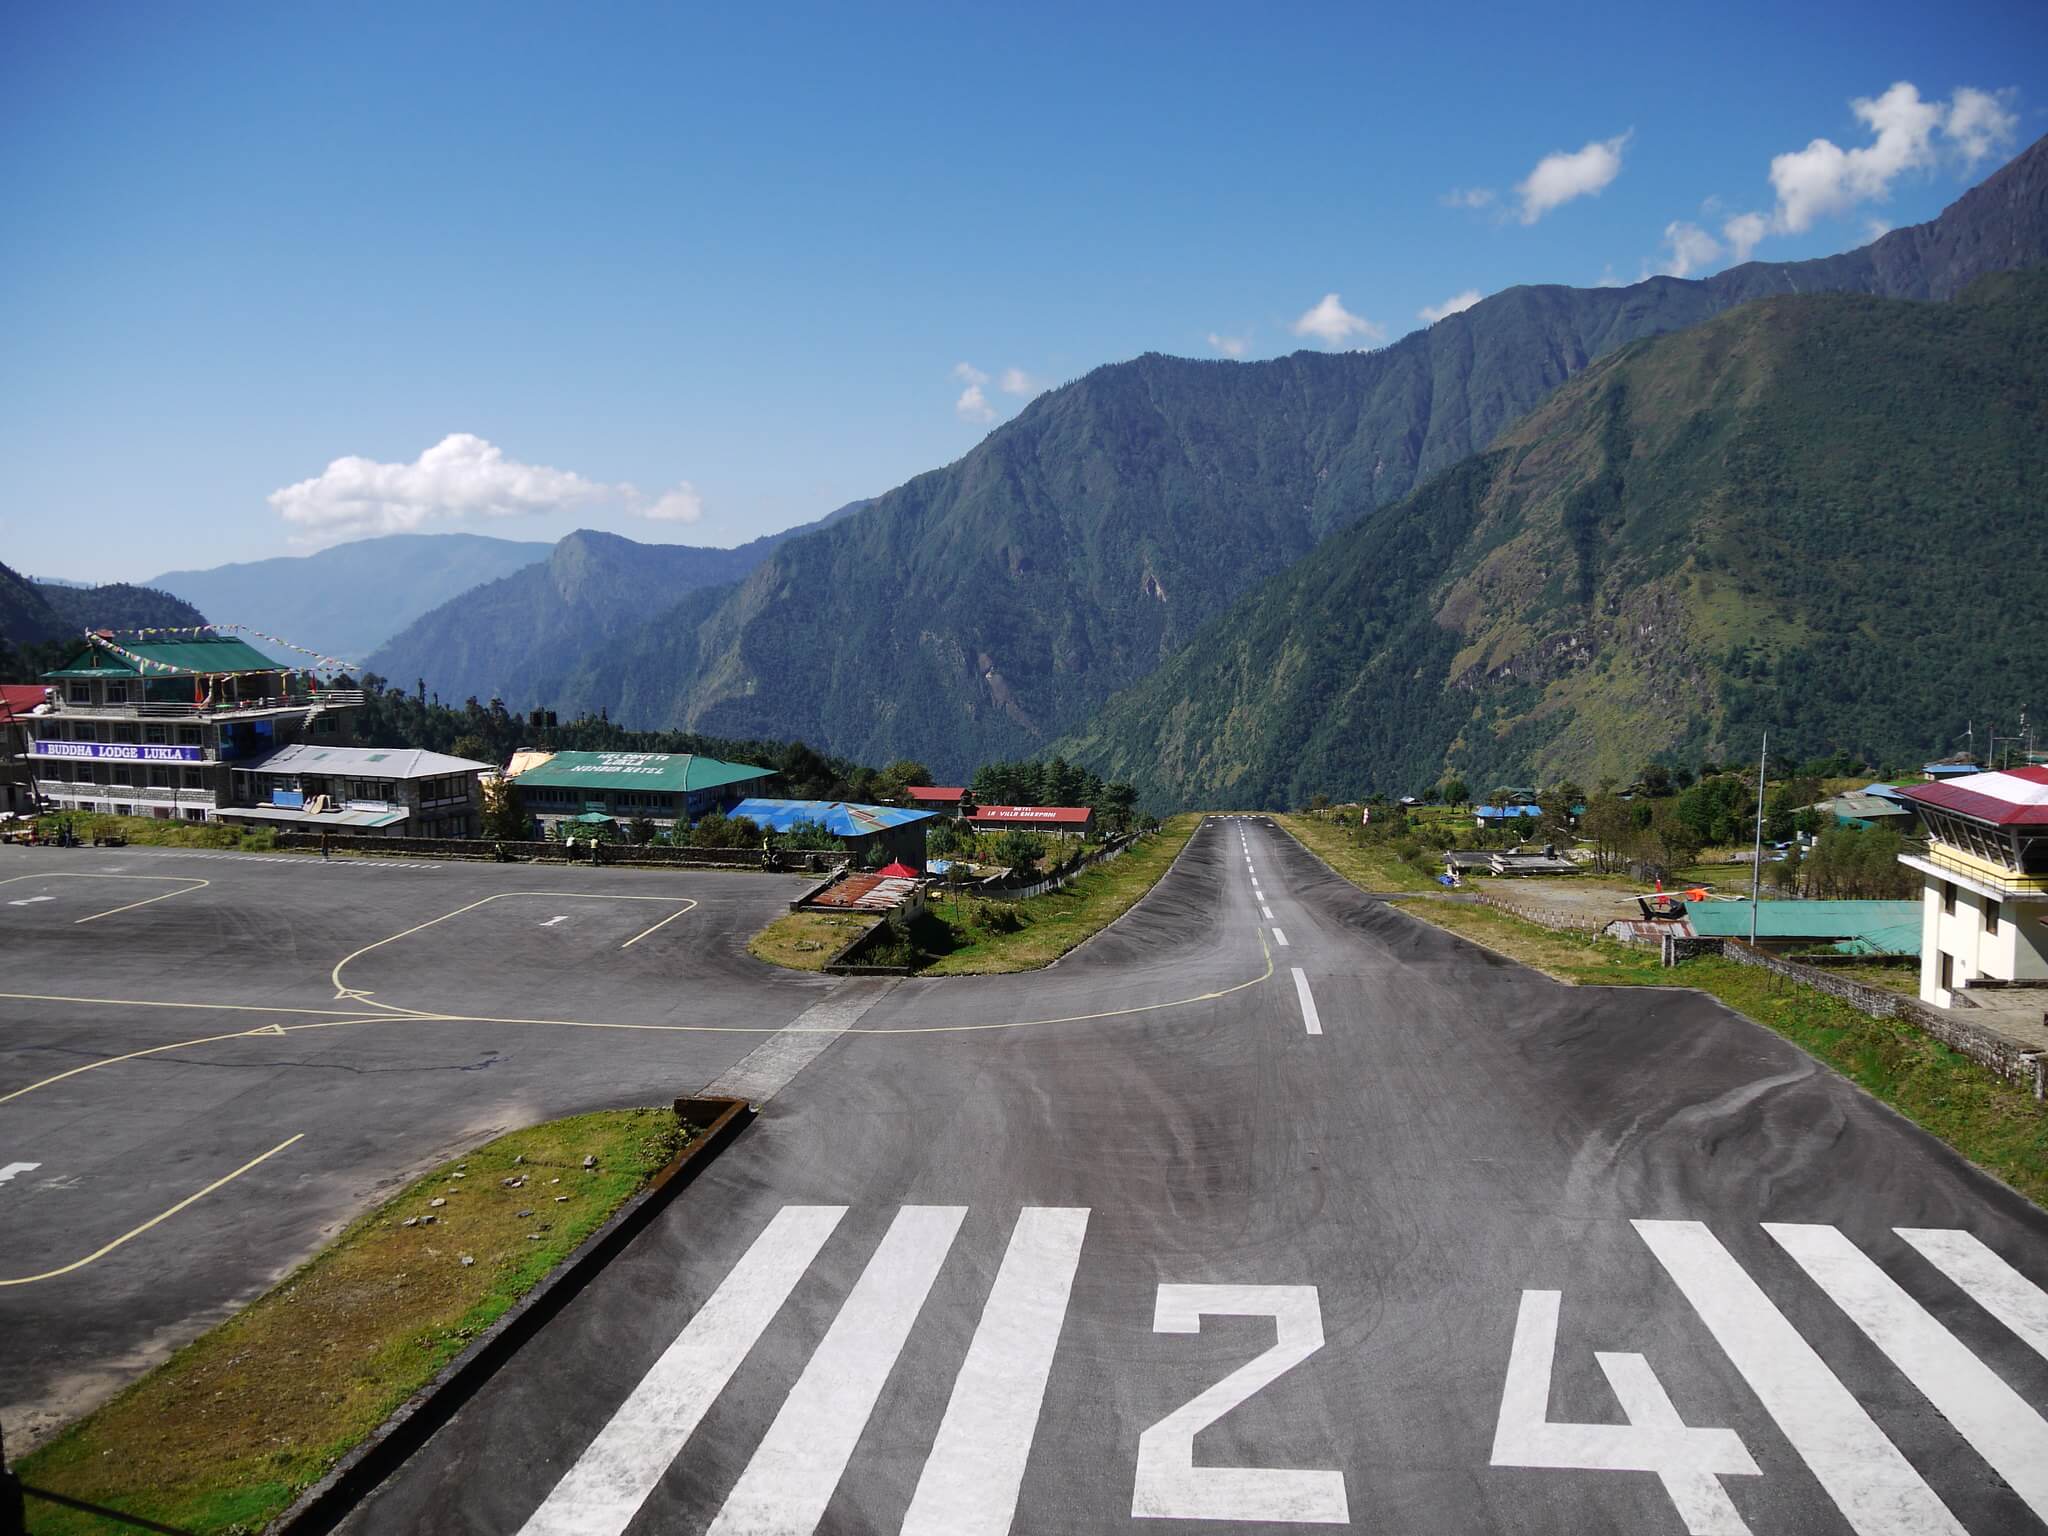
- Embark the adventure with a scenic flight to Lukla airport.
- Traverse through the off-the-beaten and less crowded trails in the Everest region.
- Hike to the vantage point of Gokyo Ri (5,357m) for a panoramic view of Everest, Lhotse, and Cho Oyu.
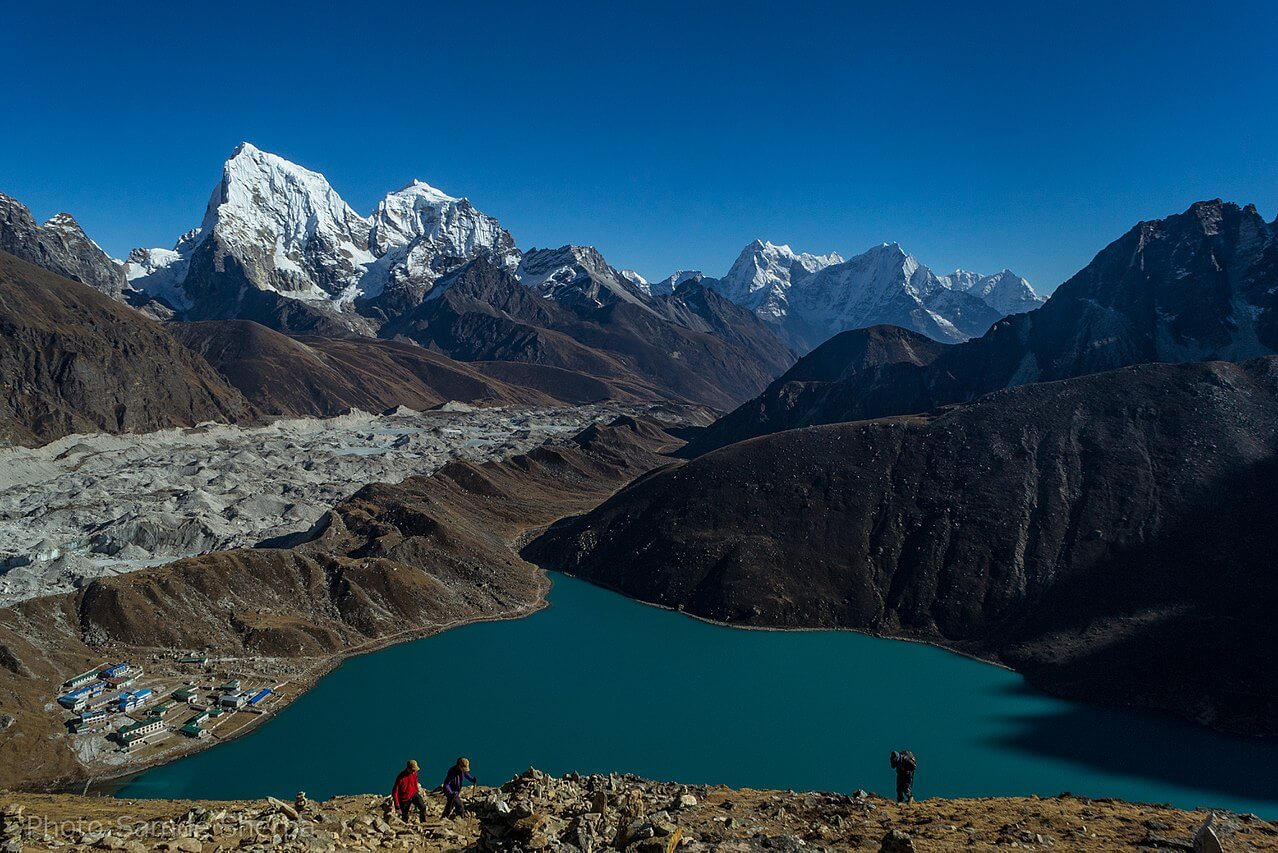
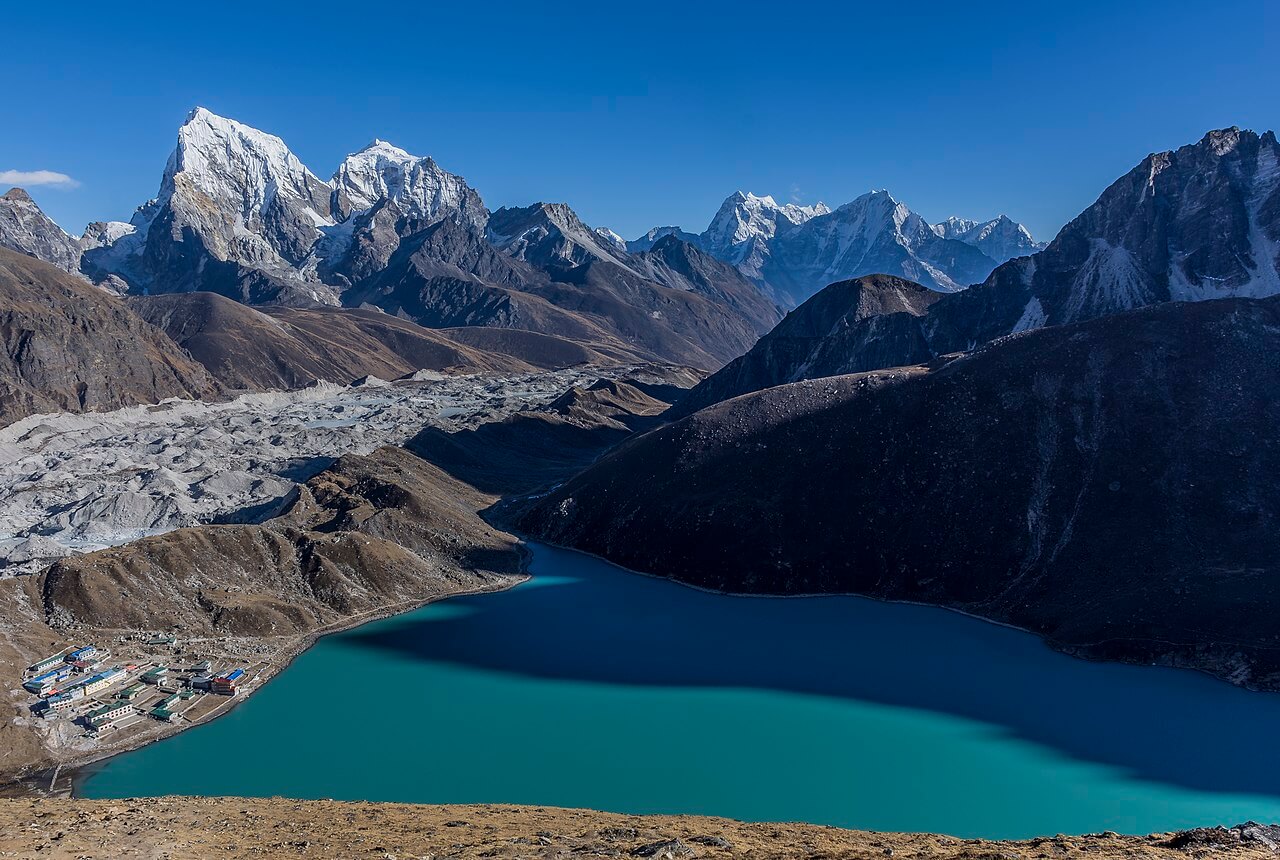
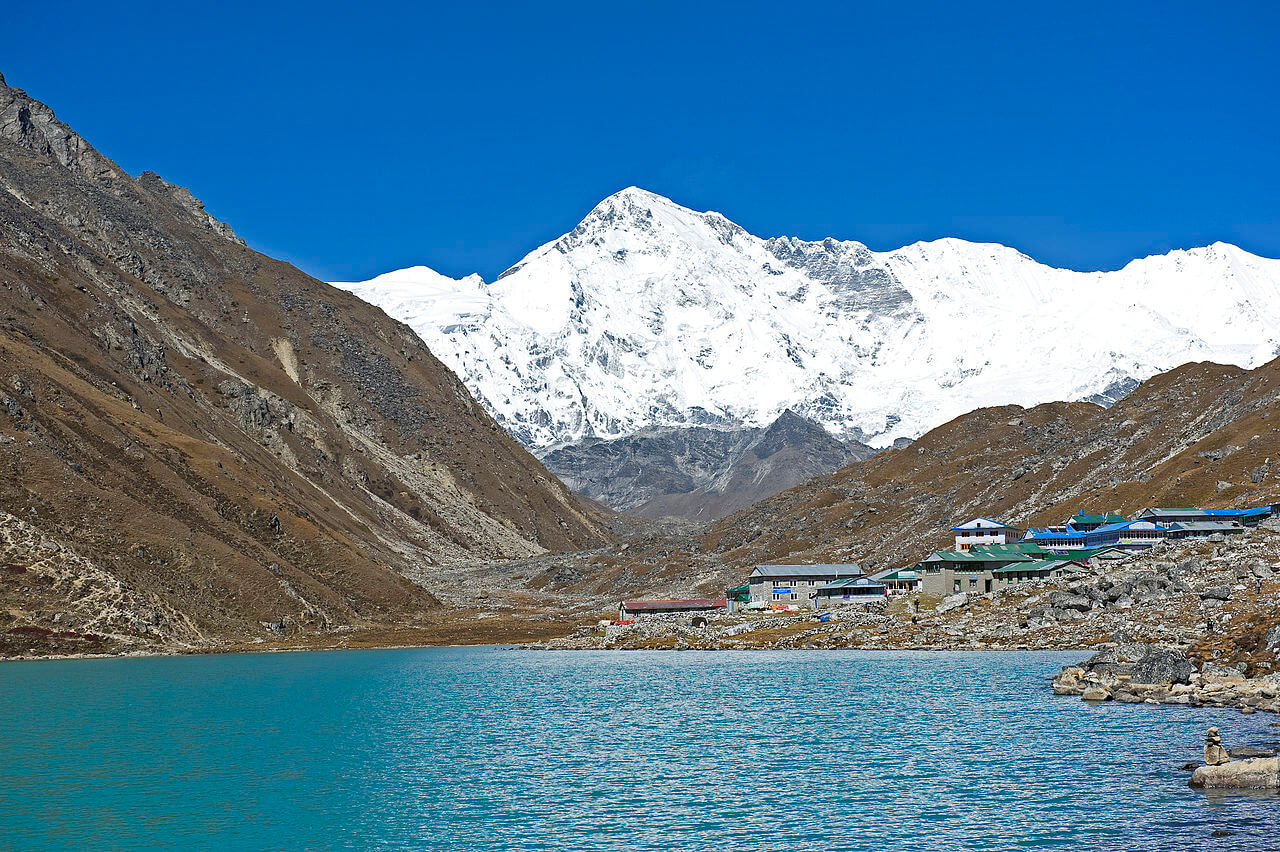
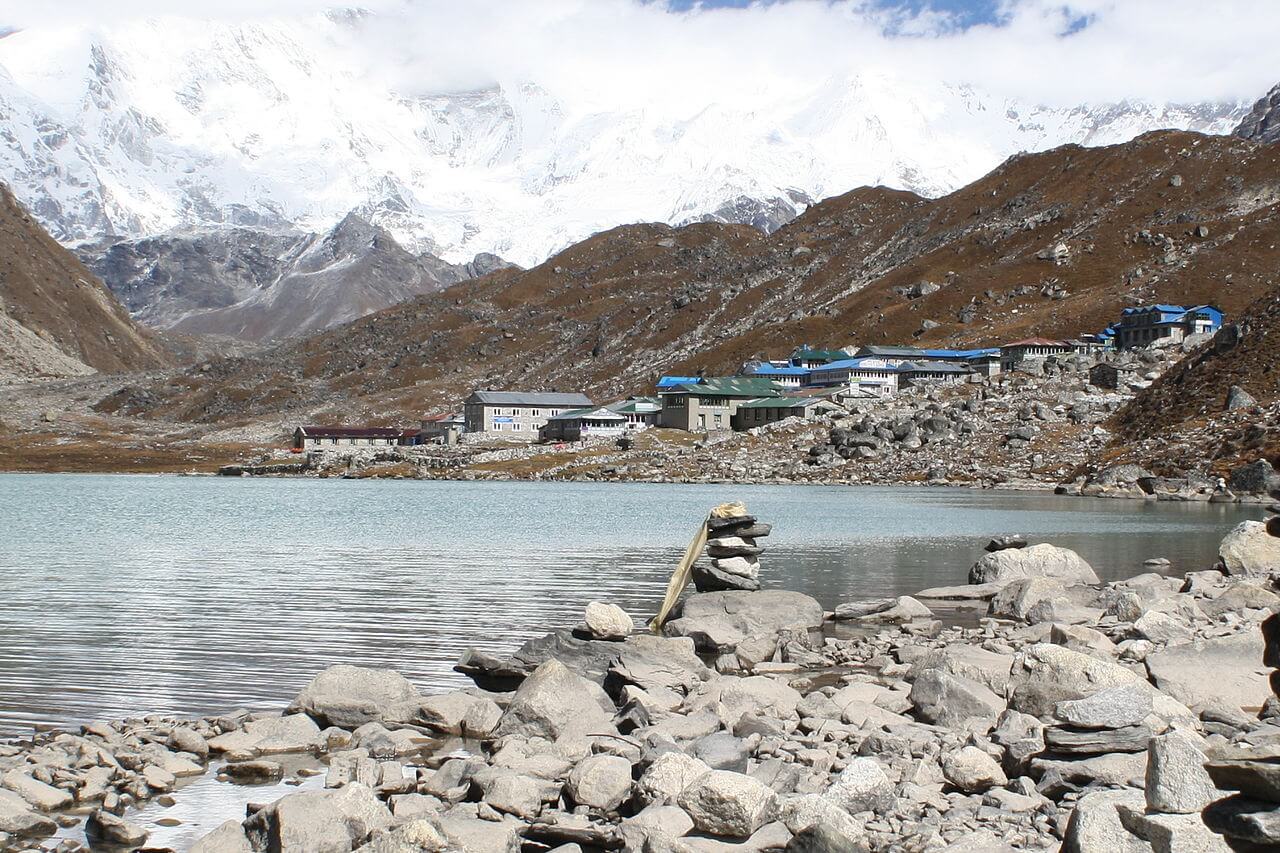
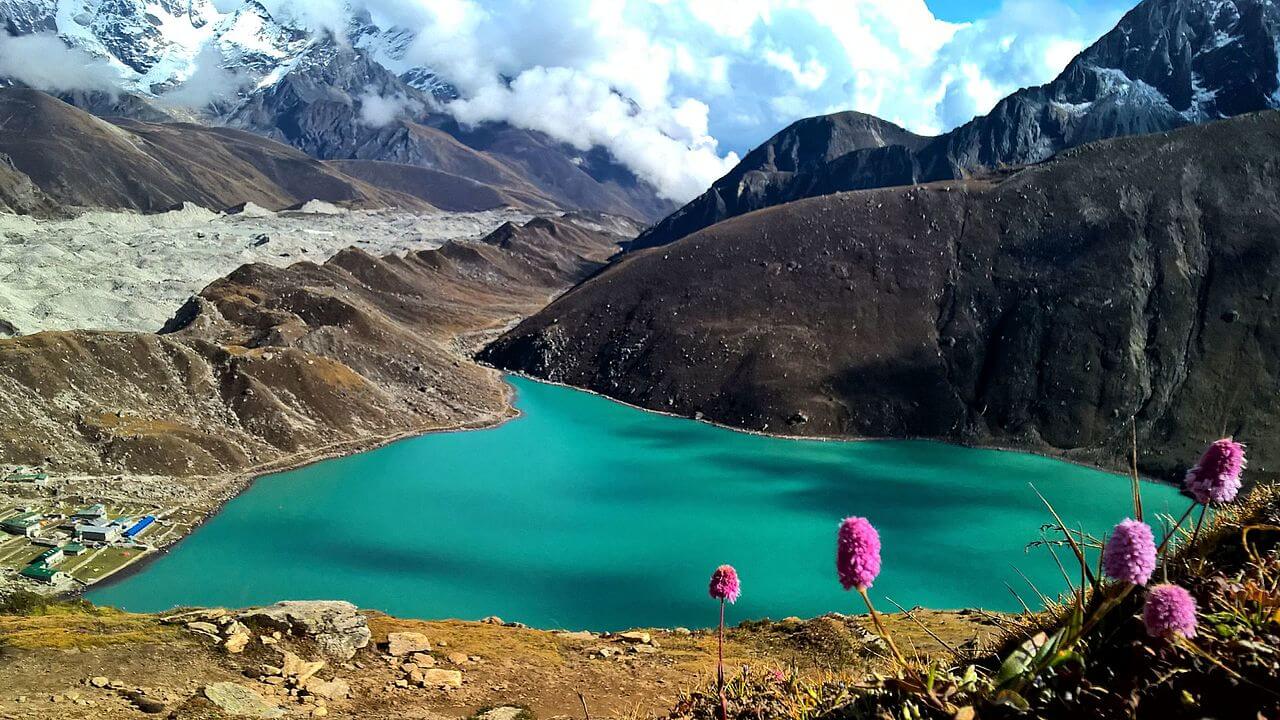
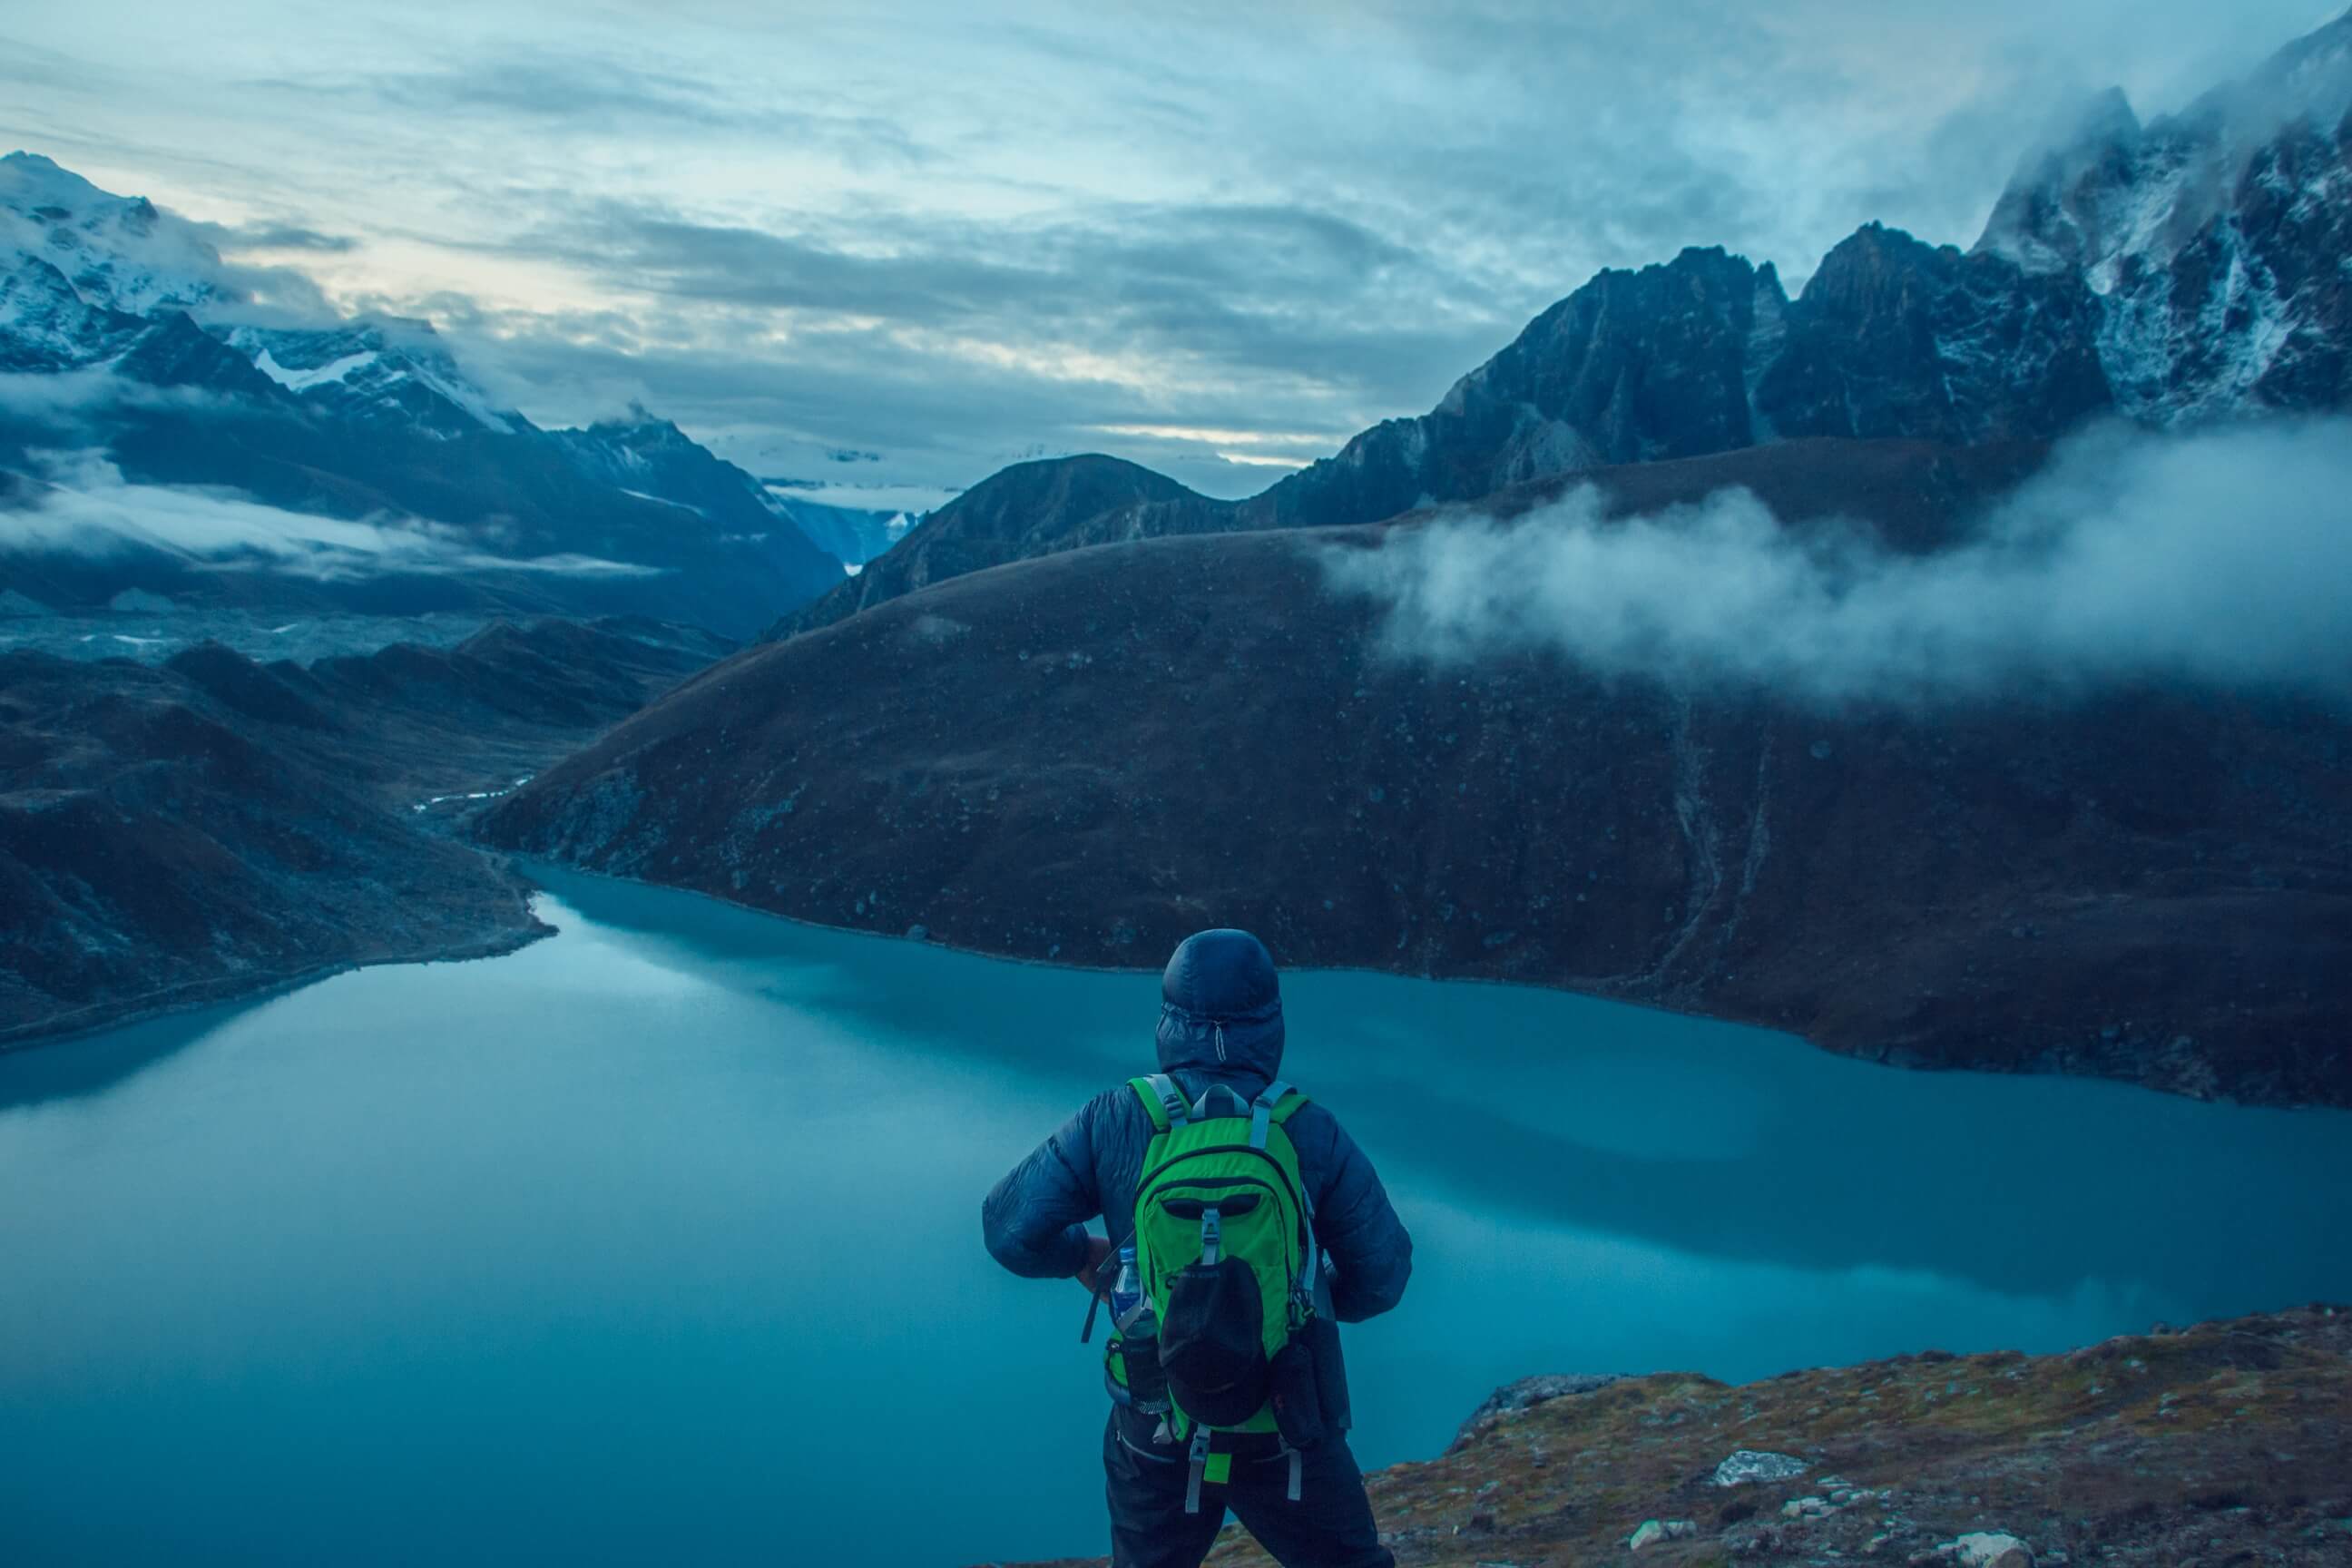
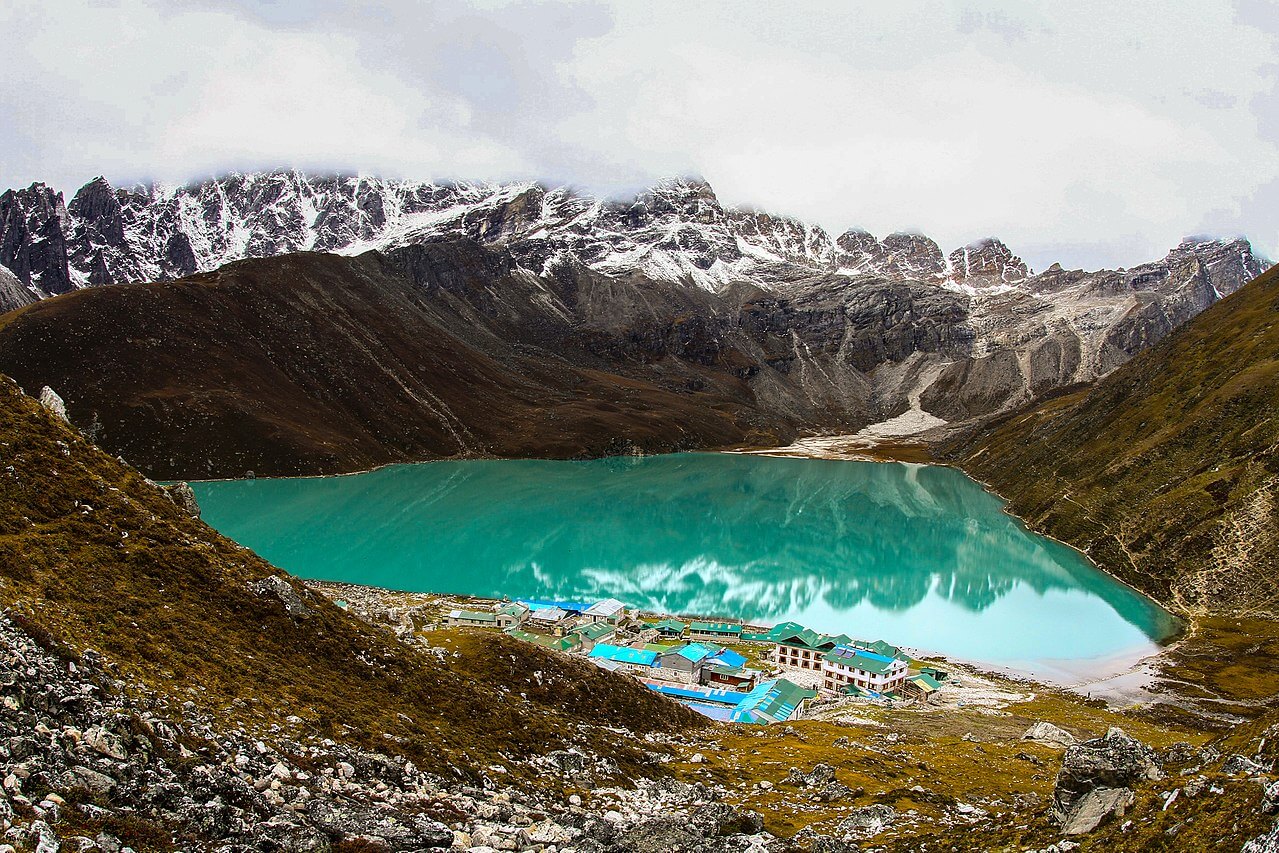
- Stand in the shore of turquoise Gokyo Lakes and relish its pristine ambiance.
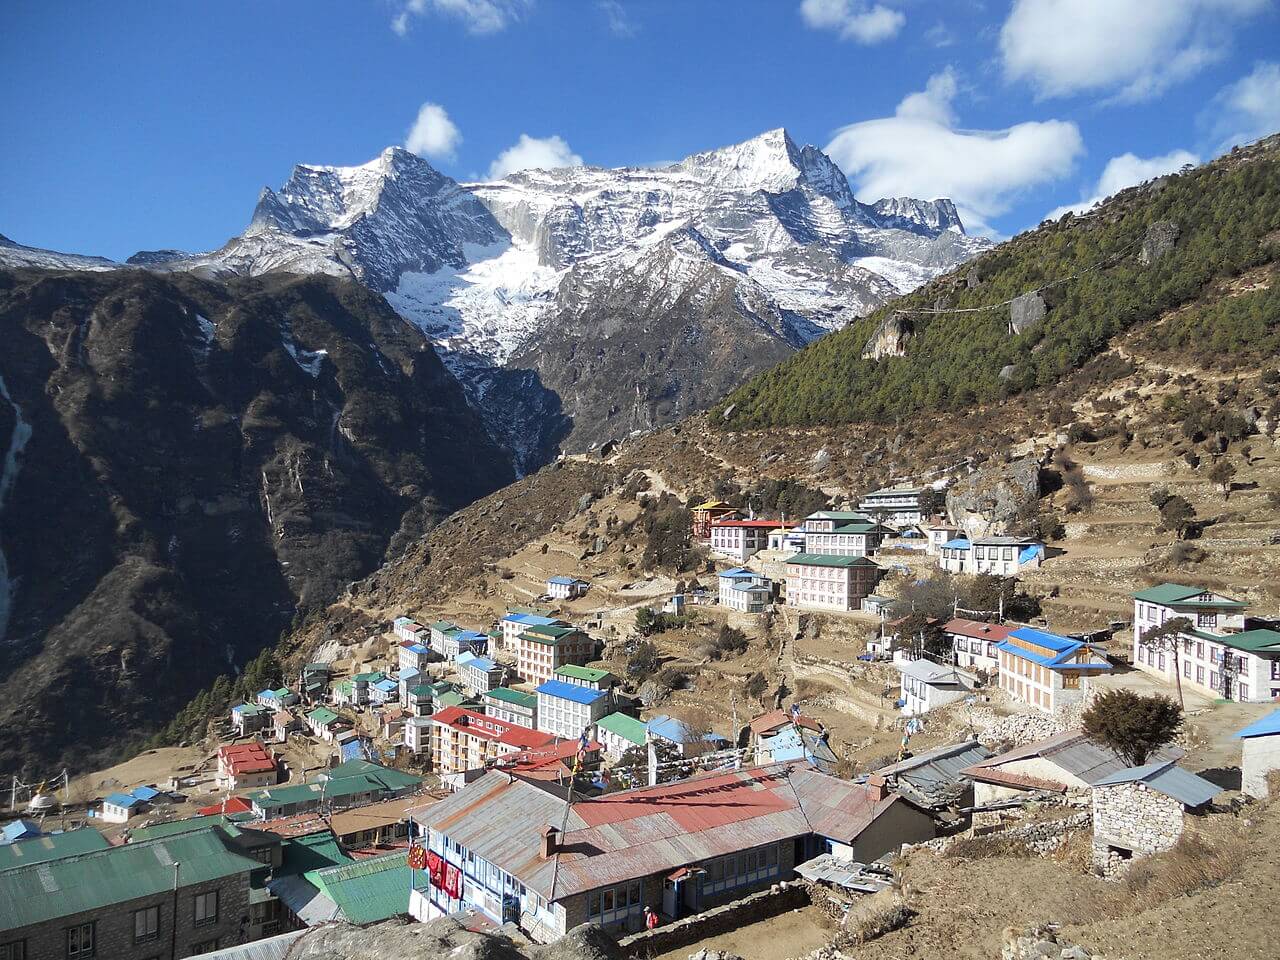
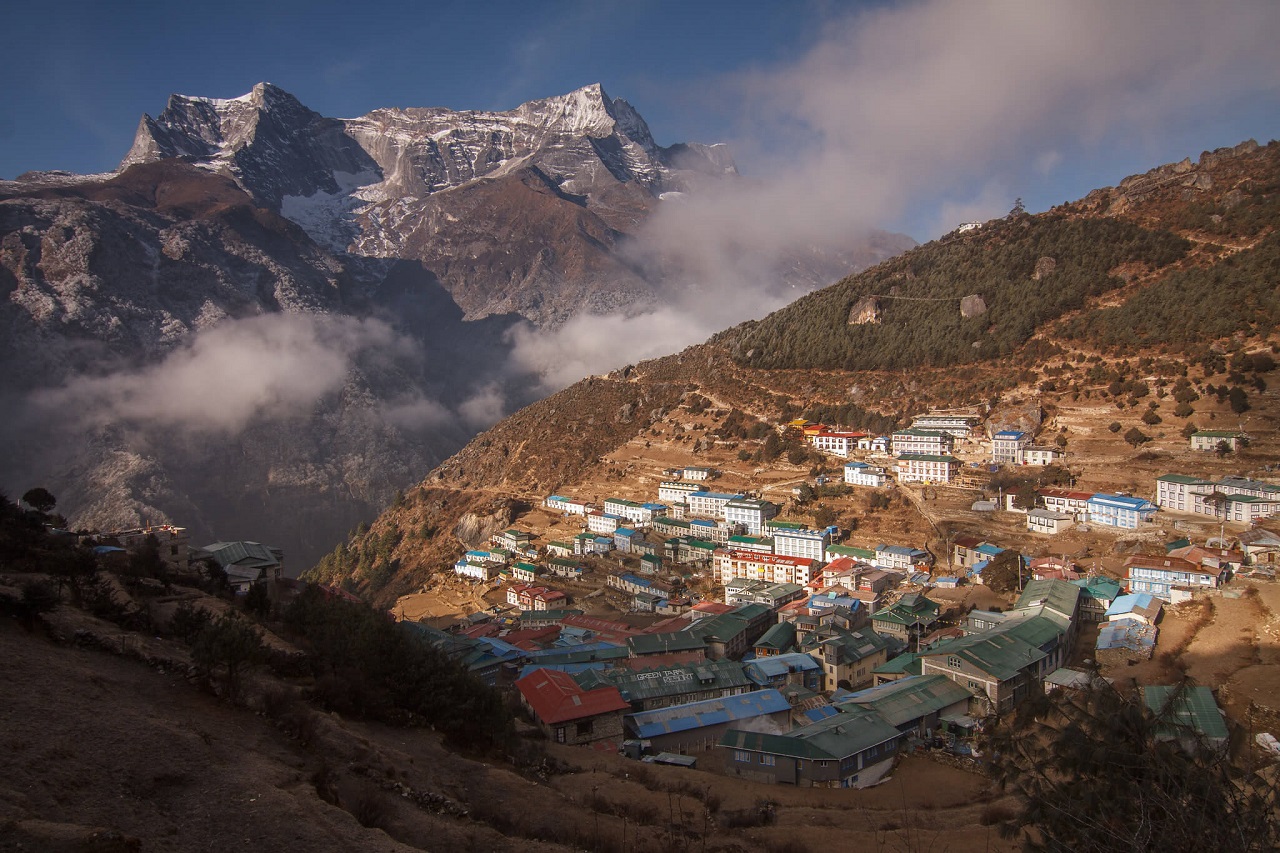
- Trek through the famous Sherpa center, Namche Bazaar.
Gokyo Ri Trek Facts
| Trip Duration | 11 days |
| Maximum Altitude | 5,357m at Gokyo Ri |
| Trip Difficulty | Challenging |
| Accommodation | Teahouse/Lodge |
| Walking Duration | 5-6 hours per day |
| Best Time to Trek | Autumn and Spring |
| Group Size | Minimum 1 Person |
Getting There and Away
Start of the Trek:
The most common method to begin the adventure of Gokyo Ri is by flight to a small town of Lukla. At an elevation of 2,800m, Lukla airport is one of the most extreme airports in the world. This exhilarating flight from Kathmandu to Lukla takes about 35-40 minutes.
In peak seasons, the airport becomes extremely busy with several flights operating back and forth. However, it is noted that unpredictable weather conditions may lead to flight delays. In worse situations, flight cancellation is quite common in Lukla. So, while booking a flight to Lukla, it is recommended to book first flights in the morning.
If you want to avoid the uncertainty of Lukla flights, the best alternative is to take the helicopter charter from Kathmandu. However, the chopper option is very costlier than regular flights.
Another alternative to escaping the Lukla flight is to drive to Jiri from Kathmandu and trek overland to Lukla or Phakding. It takes roughly 8 hours to drive to Jiri and a week to reach Lukla. Keep in mind that if you take this route to Gokyo Ri, you need to acquire an additional permit for Gaurishankar Conservation Area Project (GCAP).
End of the Trek:
Gokyo Ri Trek starts and ends at Lukla, retracing your route back to Kathmandu once you finish the trek. The most obvious way to get back to Kathmandu is by flight from Lukla. However, you can also take a helicopter option for convenience.
11 Days Gokyo Ri Trek Outline Itinerary
| Day | Itinerary | Altitude from (Meter) | Altitude to (Meter) | Trekking Duration |
|---|---|---|---|---|
| 1 | Fly to Lukla (2,800m) and Trek to Phakding | 1,400 | 2,652 | 3-4 hrs |
| 2 | Trek from Phakding to Namche Bazaar | 2,652 | 3,440 | 5-6 hrs |
| 3 | Acclimatization Day at Namche Bazaar | 3,440 | 3,440 | – |
| 4 | Trek from Namche Bazaar to Dole | 3,440 | 3,680 | 5-6 hrs |
| 5 | Trek from Dole to Machhermo | 3,680 | 4,470 | 4 hrs |
| 6 | Trek from Machhermo to Gokyo Valley | 4,470 | 4,800 | 4 hrs |
| 7 | Excursion to Gokyo Ri (5,357m) and back to Gokyo Valley | 4,800 | 4,800 | 4 hrs |
| 8 | Trek from Gokyo Valley to Dole | 4,800 | 3,680 | 6-7 hrs |
| 9 | Trek from Dole to Namche Bazaar | 3,680 | 3,440 | 5-6 hrs |
| 10 | Trek from Namche Bazaar to Lukla | 3,440 | 2,800 | 7-8 hrs |
| 11 | Fly from Lukla to Kathmandu | 2,800 | 1,400 | 40 mins |
Gokyo Ri Trek Detailed 11 Days Itinerary
Day 1: Fly from Kathmandu (1,400m) to Lukla (2,800m) and Trek to Phakding (2,652m) – 3 to 4 hours
The thrilling adventure of Gokyo Ri begins with a 40-minute flight from Kathmandu to Tenzing-Hillary Airport, Lukla. Since most of aerial trips to this town take place early in the morning, you’ll have plenty of time for yourself. Take advantage of the time and trek to the small village of Phakding instead.
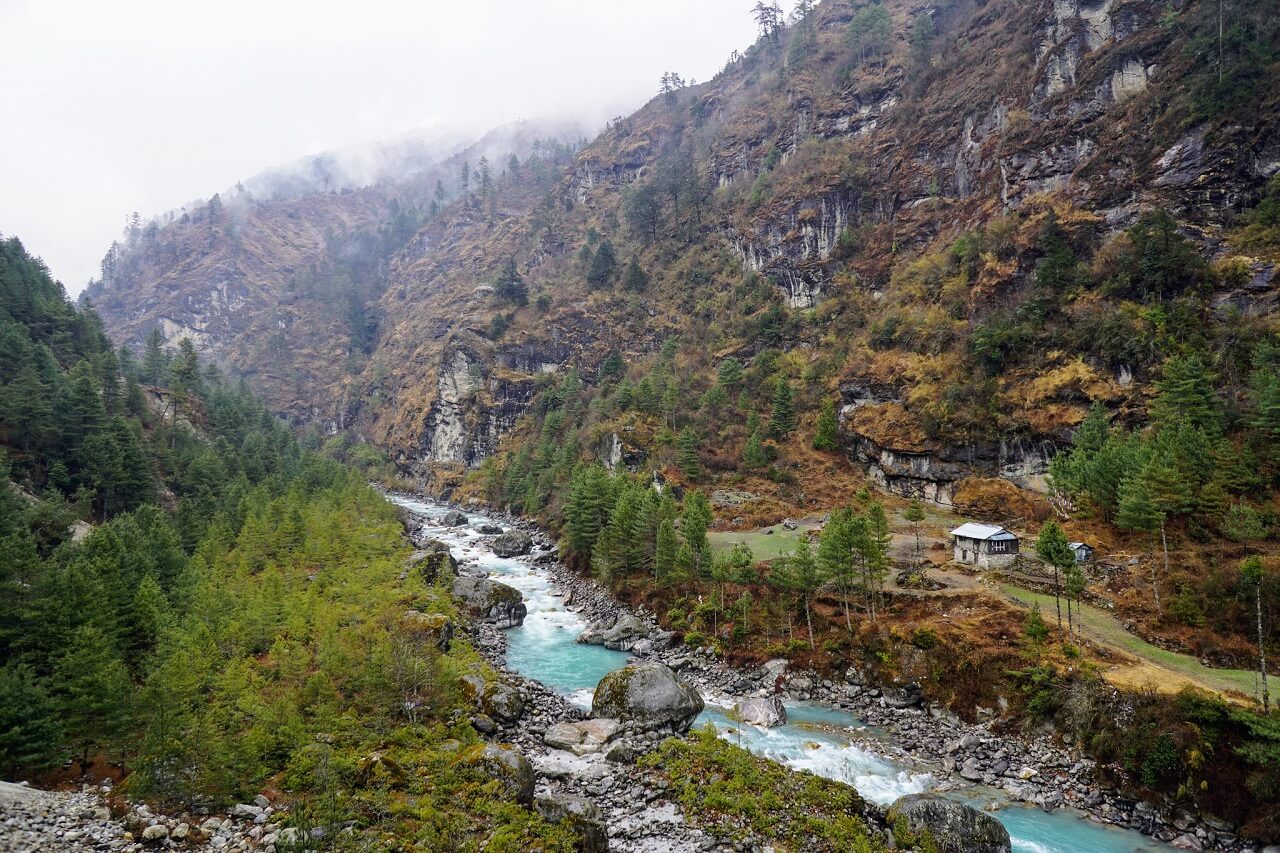
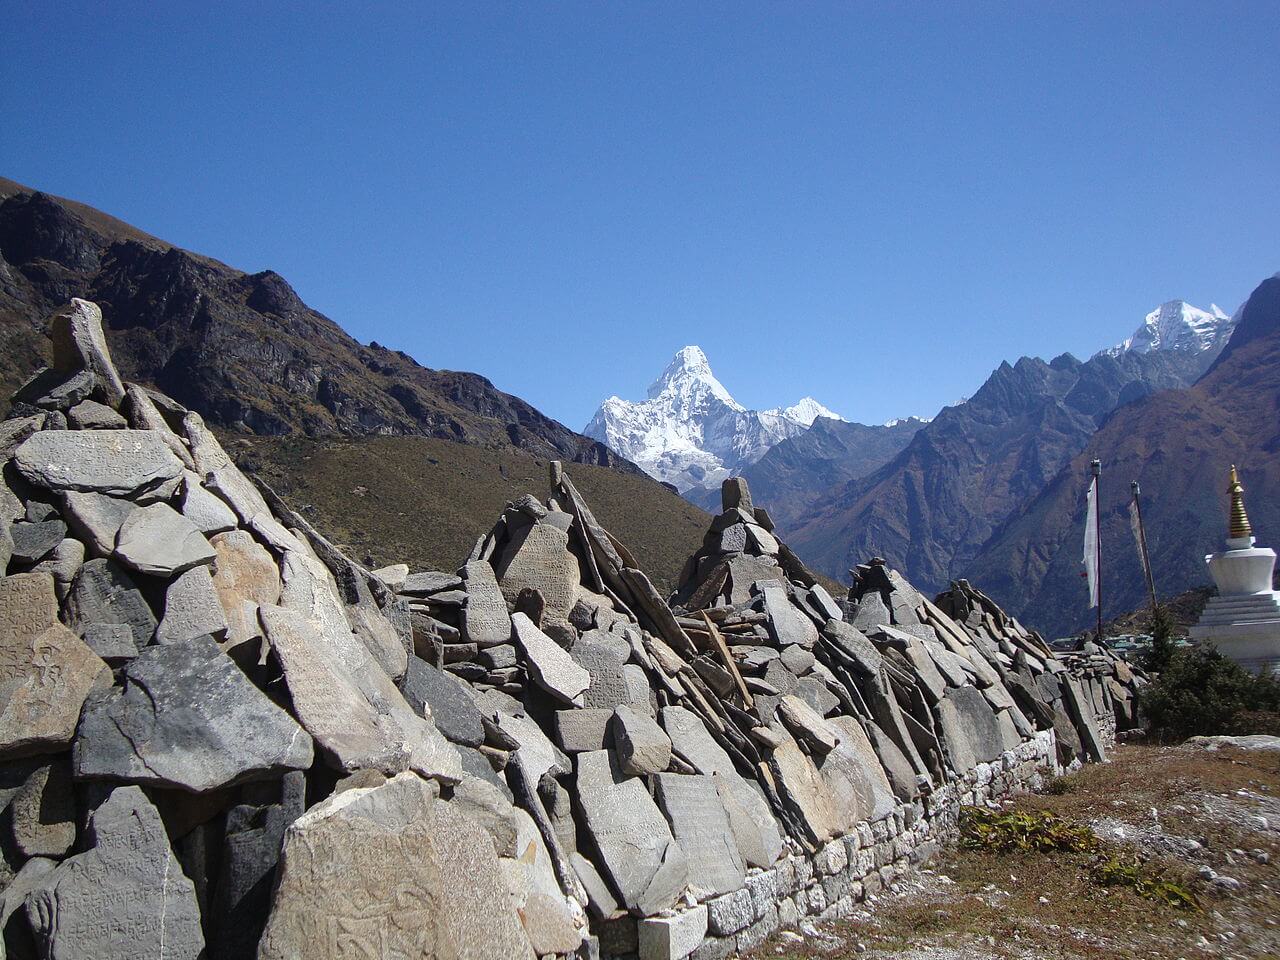
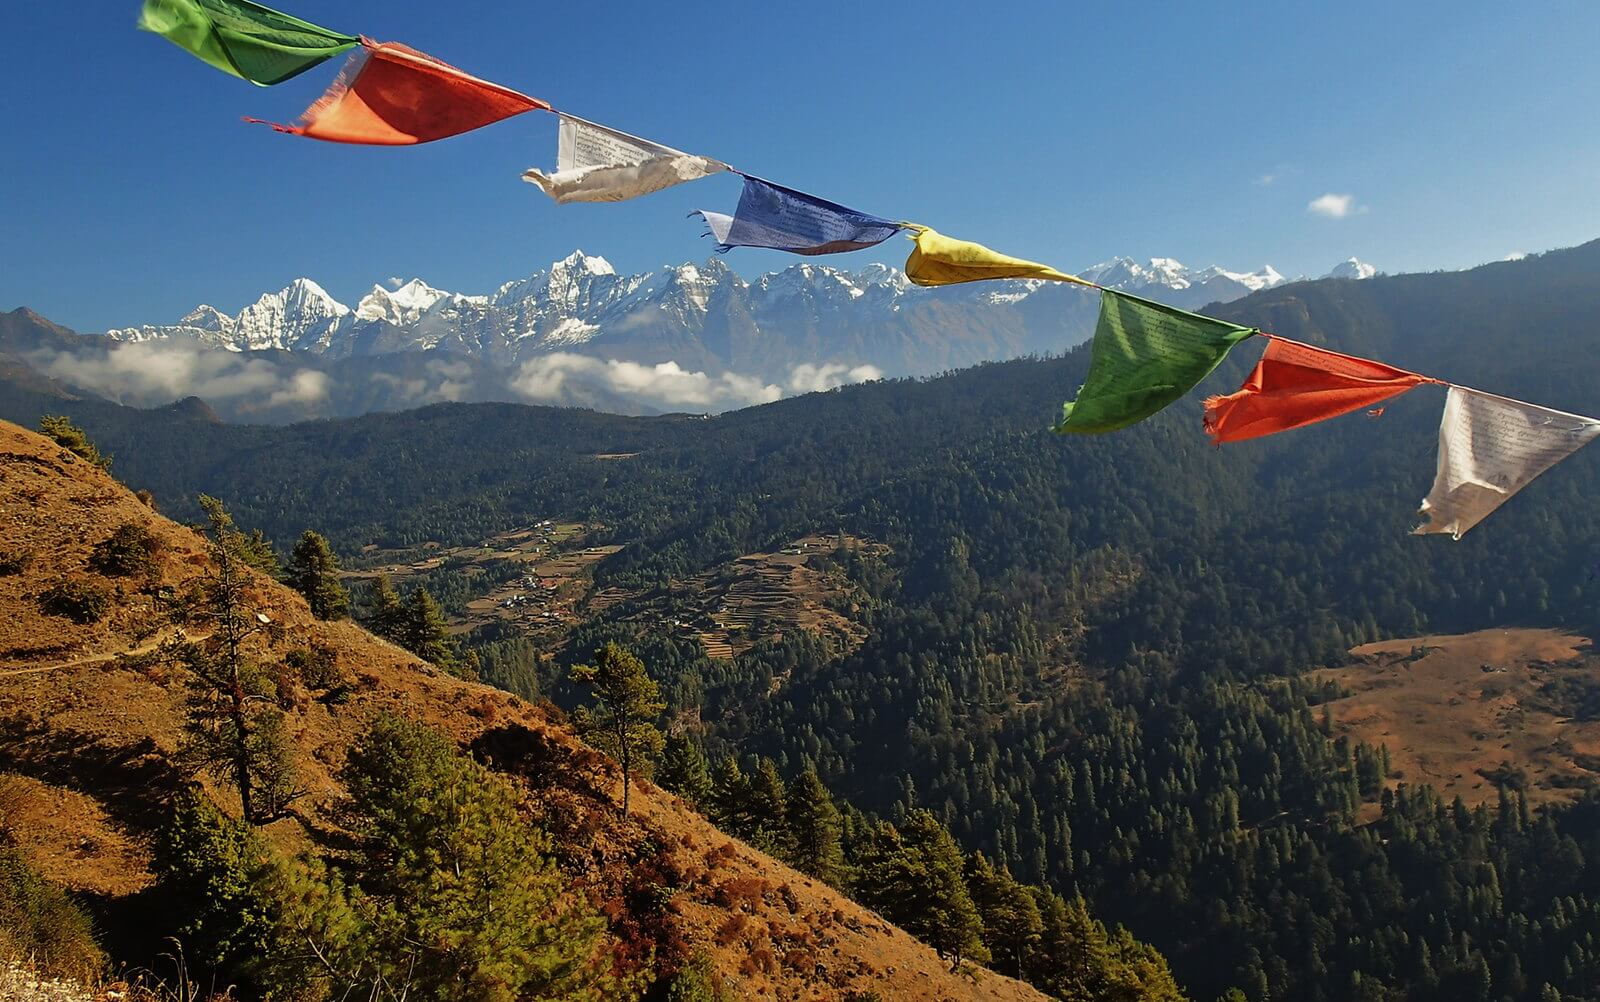
The trail to Phakding is short and gentle through the valleys until you reach the Dudh Koshi River. You’ll come across several suspension bridges, chortens, Mani walls, and prayer flags. It takes approximately 3 to 4 hours to reach Phakding.
Day 2: Trek from Phakding (2,652m) to Namche Bazaar (3,440m) – 5 to 6 hours
You start the day with a pleasant walk alongside the Dudh Koshi River towards Monjo. The route traverses through the shades of rhododendron and magnolia trees.
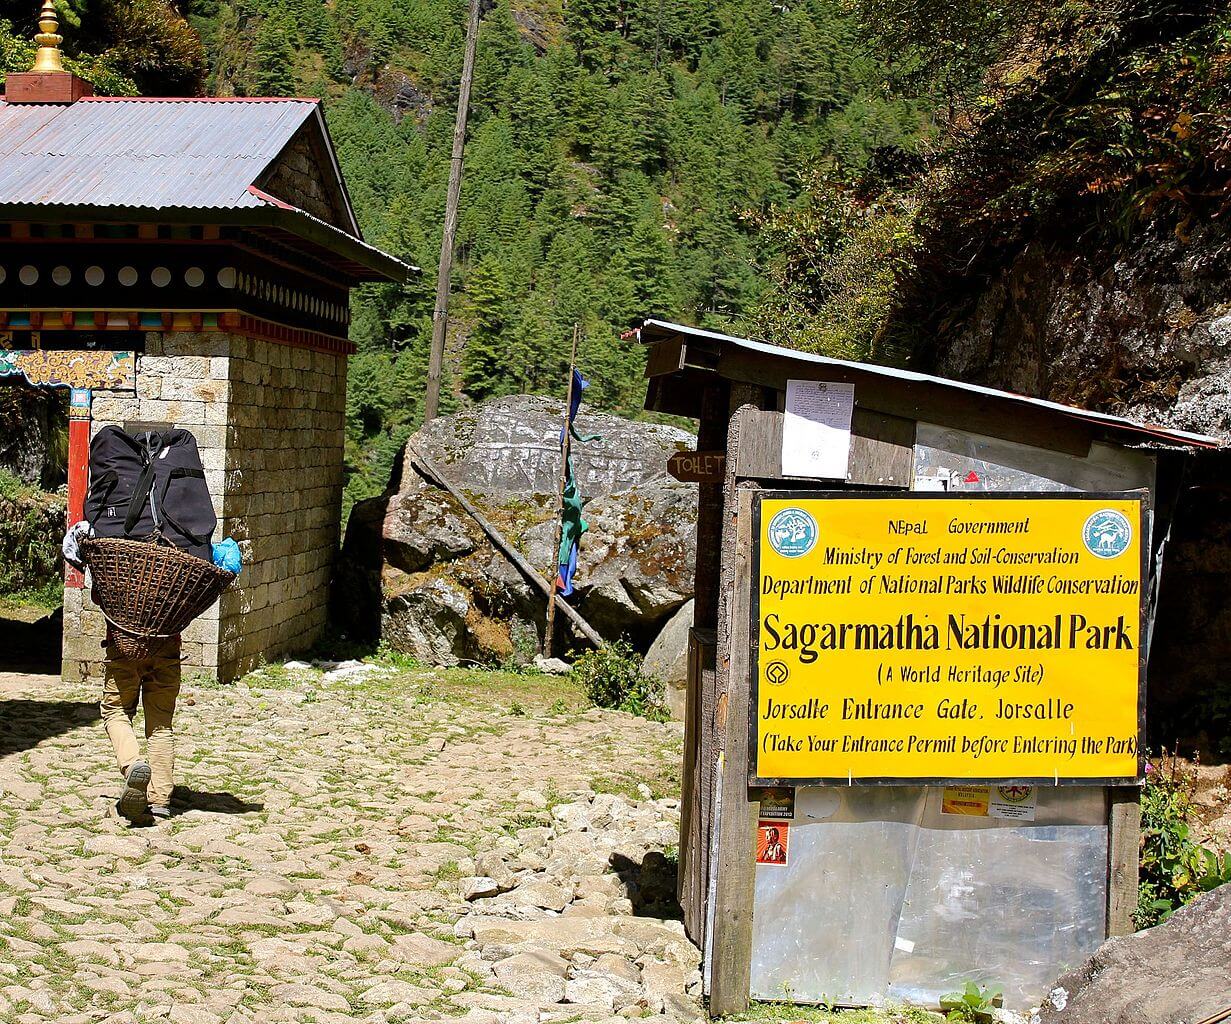
You enter through the Sagarmatha National Park gate at Monjo. Before you check-in to the National Park, you’ll have to show your TIMS Card and permit in the checkpoint. As you walk further into the village, the views of the mountains begin to unfold on the faraway horizon.
After crossing the Hillary Suspension Bridge over the Dudh Koshi River, the route is slightly strenuous with a steep uphill to Namche Bazaar.
Day 3: Acclimatization Day at Namche Bazaar (3,440m)
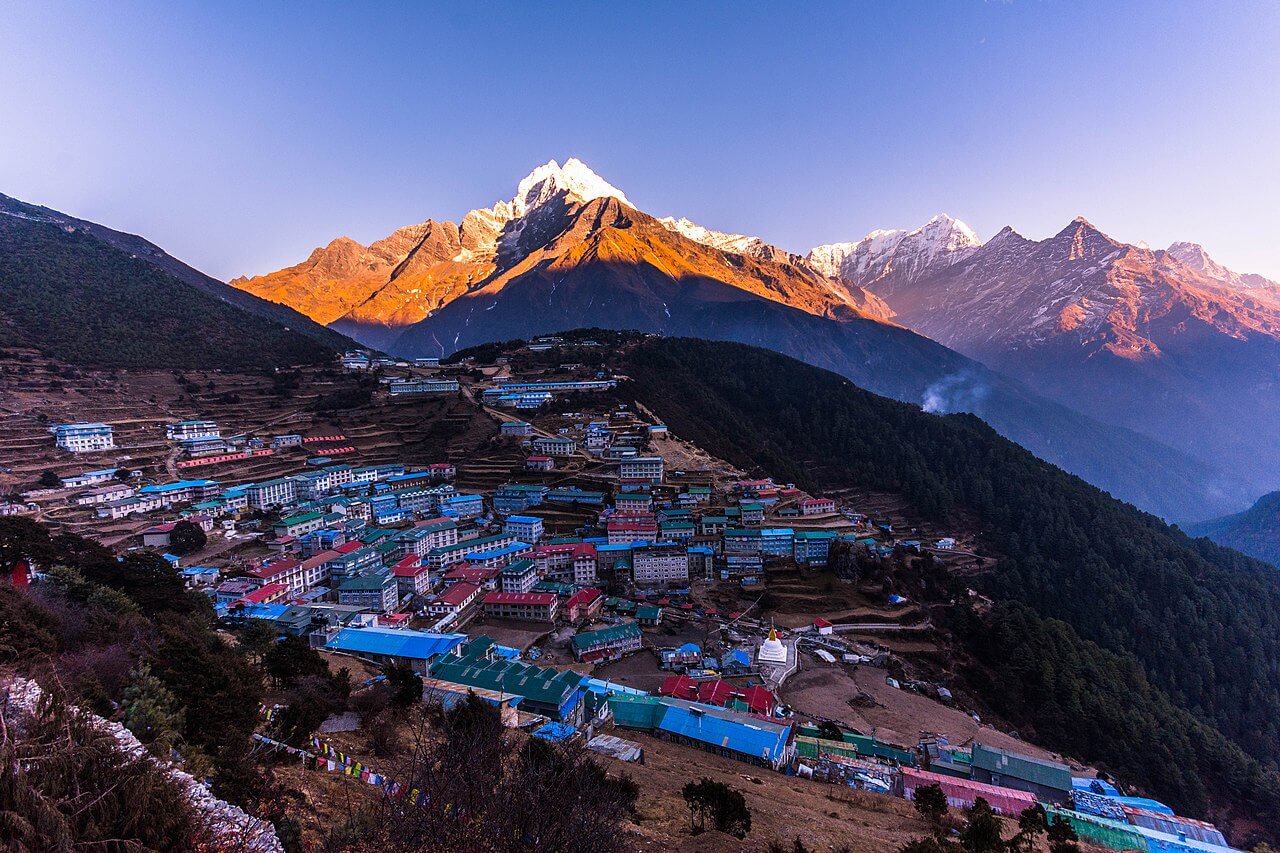
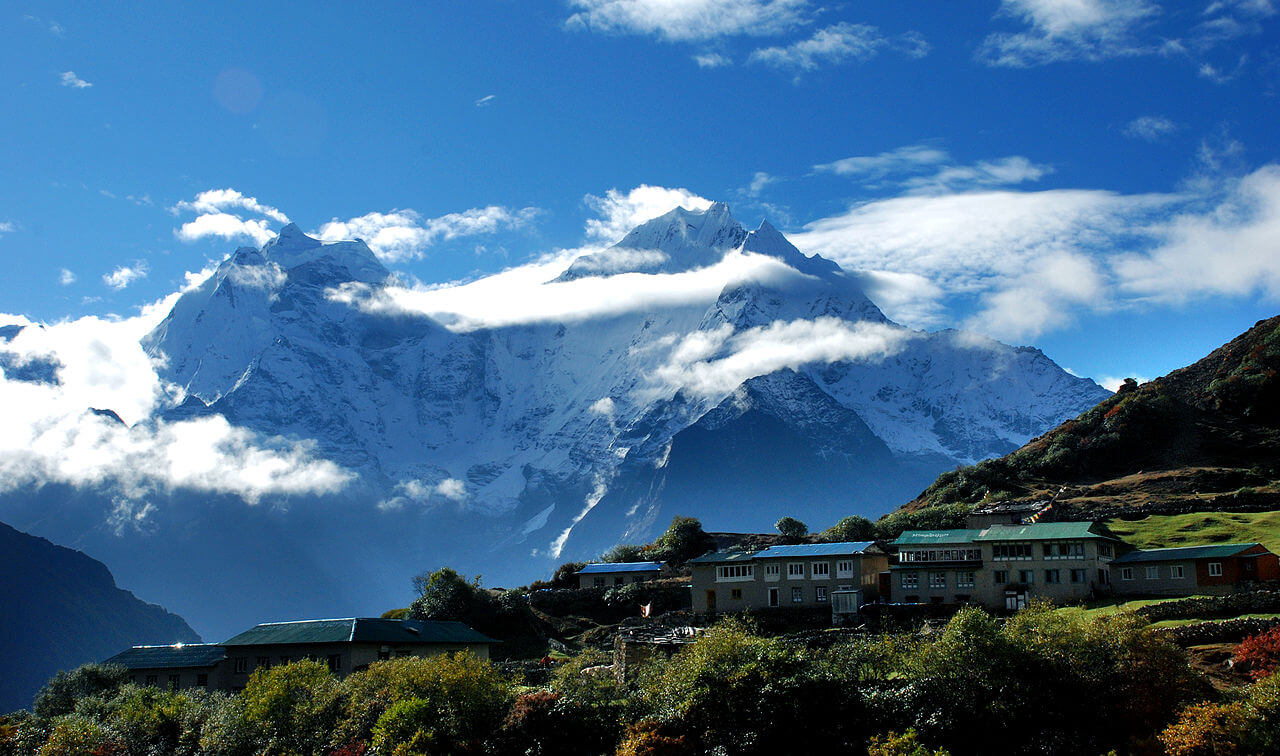
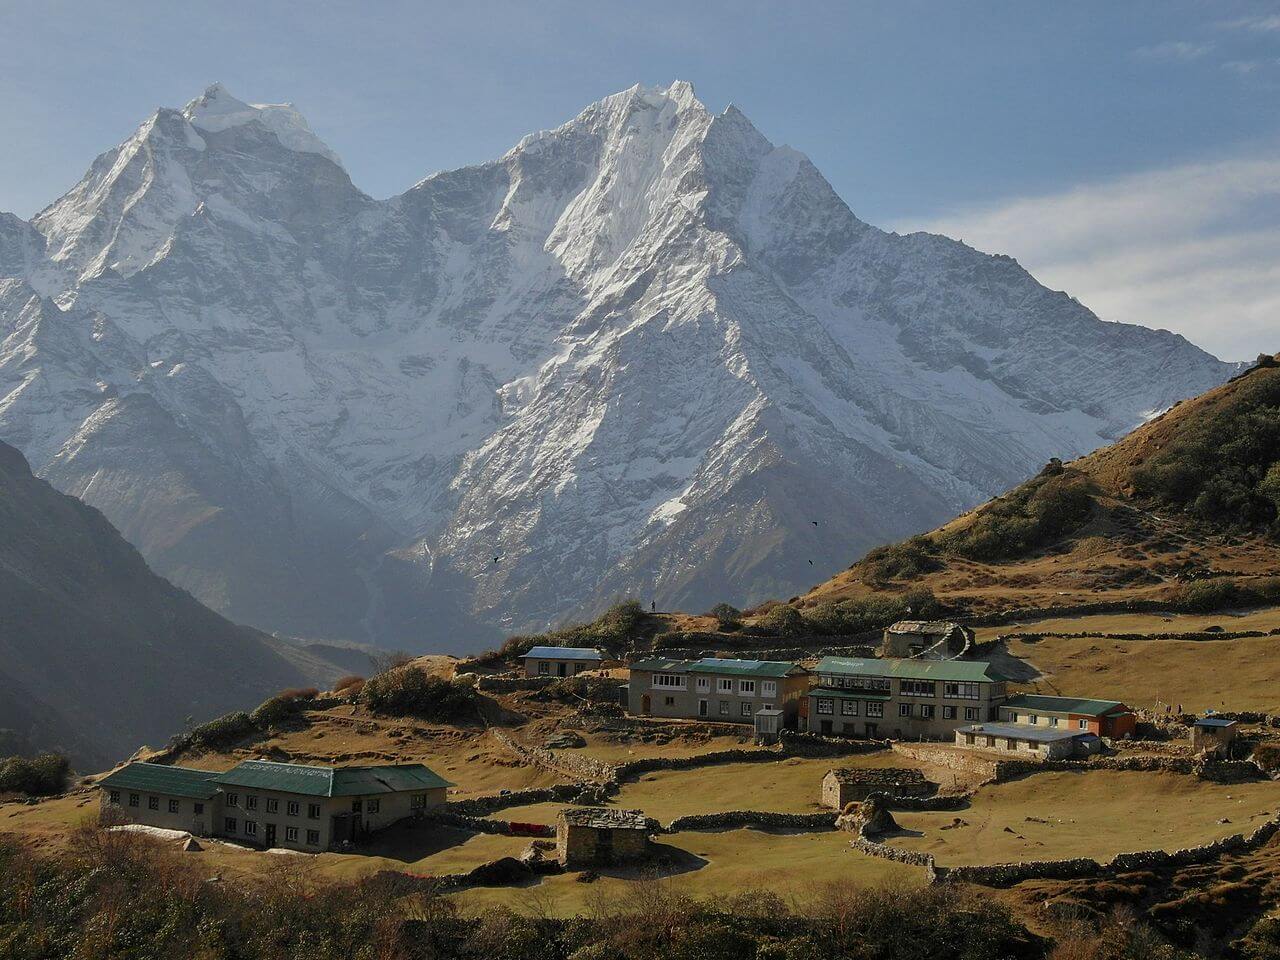
A much-needed rest day at Namche Bazaar is acclimatizing in the higher elevation. Namche Bazaar represents a historic trading hub with colorful markets, ancient culture, and lively ambiance.
Stroll around the prosperous Sherpa town of Namche or hike over the ridge towards Hotel Everest View to enjoy the breathtaking sceneries of mountains. If time permits, you can also walk to a nearby village of Khumjung and visit the ancient monastery.
Day 4: Trek from Namche Bazaar (3,440m) to Dole (3,680m) – 5 to 6 hours
The trek day begins with a gentle climb to Kyangjuma village. The village rewards you the marvelous spectacles of Ama Dablam, Thamserku, and Kangtega. Then, the trail leads to the steeper section before reaching a small settlement at Mong La.
On your lucky day, it is quite common for you to spot animals like mountain goats and musk deer on this trail. You’ll reach Dole in about 5 to 6 hours from Namche Bazaar.
Day 5: Trek from Dole (3,680m) to Machhermo (4,470m) – 4 hours
On this day, you resume the trek with a steep ascent through the ridge just above Dole. Thorny bushes surround the path as it leads to the beautiful hamlet of Luza via Lhabarma. Significantly, the fascinating vistas of Cho Oyu, Kantega, and Thamserku embellish the backdrop throughout the day. Walking through the hills above the raging Dudh Koshi, you’ll reach Marchhermo in approximately 4 hours.
Day 6: Trek from Machhermo (4,470m) to Gokyo Valley (4,800m) – 4 hours
You climb the ridge above Macchermo to relish the beautiful sight of the mountains and the valley. The trail descends to the riverbanks and then climbs up through the terminal moraine of Ngozumpa Glacier, the Himalayas’ longest glacier.
As you walk past the challenging path of the moraine, you’ll reach the first lake of Gokyo, known as Longpongo. The second lake, Taboche Tsho, is situated slightly ahead of the first one. Furthermore, the third lake glittering with sunlight lies a little ahead of the second lake.
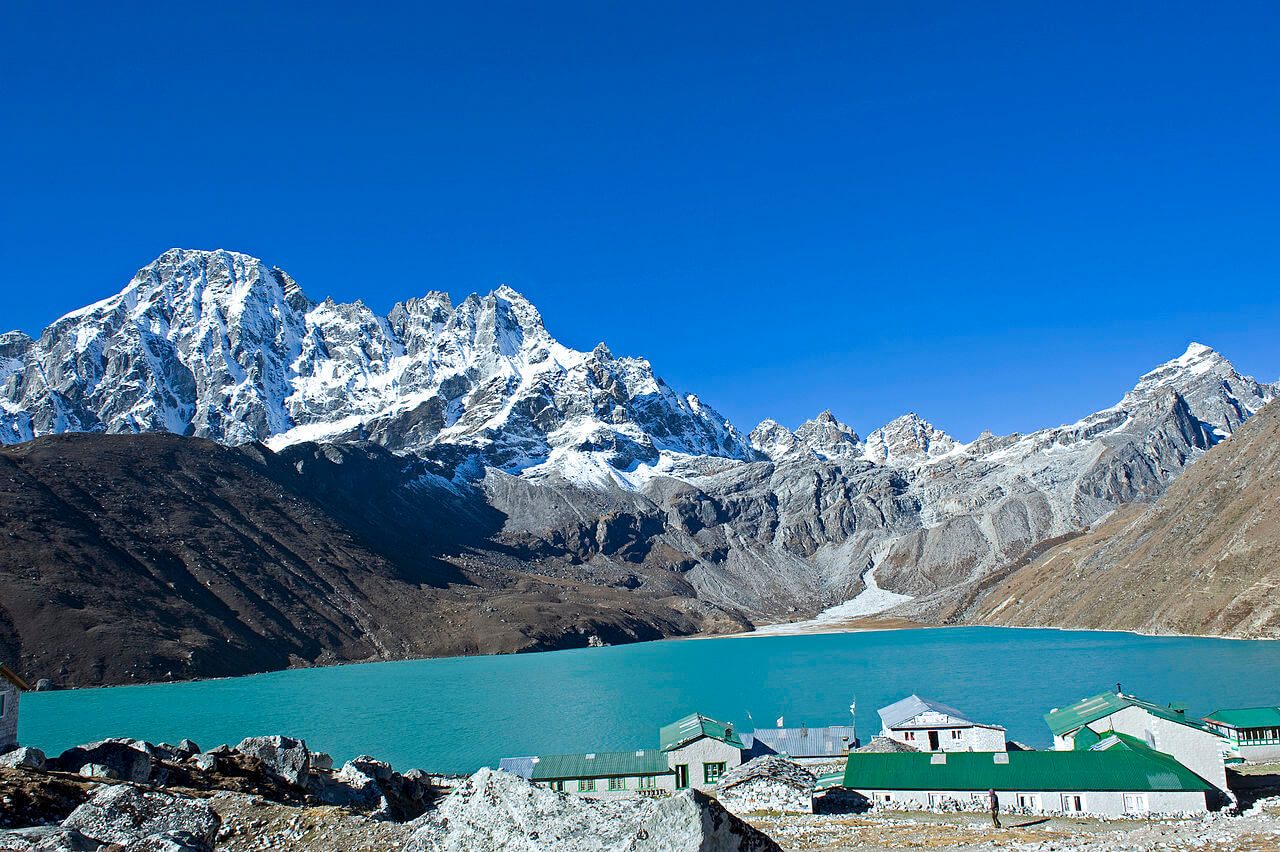
The Gokyo valley stands on the shore of the third lake with Cho Oyu looming magnificently in the backdrop.
Day 7: Excursion to Gokyo Ri (5,357m) and back to Gokyo Valley (4,800m) – 4 hours
This day marks the major highlights of the entire trek. On this day, you’ll hike to the vantage point of Gokyo Ri at an elevation of 5,357 meters. The climb to the viewpoint is strenuous and takes 3 to 4 hours to reach the top.
Relish the panoramic spectacles of mountains like Everest, Nuptse, Thamserku, Makalu, Lhotse, and Pumori from the top. The exhilarating views of Gokyo lakes and Ngozumba glaciers will surpass your expectations.
You’ll retrace your route back to Gokyo Valley for the night.
Day 8: Trek from Gokyo Valley (4,800m) to Dole (3,680m) – 6 to 7 hours
The day begins retracing the exact route departing from the lakes and through the moraines of Ngozumba glaciers. You’ll come across several stone chortens along the way. The splendid views of Thamserku and Kangtega will accompany you on the way down from Gokyo Valley. You’ll reach Dole in approximately 6 to 7 hours of walking.
Day 9: Trek from Dole (3,680m) to Namche Bazaar (3,440m) – 5 to 6 hours
The day begins with a steep downhill toward Phortse Tenga. It takes approximately ONE and a half hours to reach Phortse Tenga from Dole. Then, the trail ascends steeply from Phortse Tenga up to the village of Mongla.
Furthermore, the trail descends towards Kyangjuma before reaching the Sherpa Capital at Namche Bazaar. It takes approximately 5 to 6 hours of gentle walk from Dole to Namche Bazaar.
Day 10: Trek from Namche Bazaar (3,440m) to Lukla (2,800m) – 7 to 8 hours
On this day, you retrace the route back to Lukla from Namche Bazaar. The trail descends through the shades of pine trees. Walking alongside the Dudh Koshi River and crossing the suspension bridges over the river several times, you’ll reach Phakding.
After Phakding village, the walk is gentle and enjoyable till you reach Lukla.
Day 11: Fly from Lukla (2,800m) to Kathmandu (1,400m) – 40 minutes
Final day in the mountains. You’ll take an early morning flight from Lukla airport to Kathmandu. It takes about 35 to 40 minutes to reach Kathmandu airport.
Extension
Gokyo Ri with Everest Base Camp
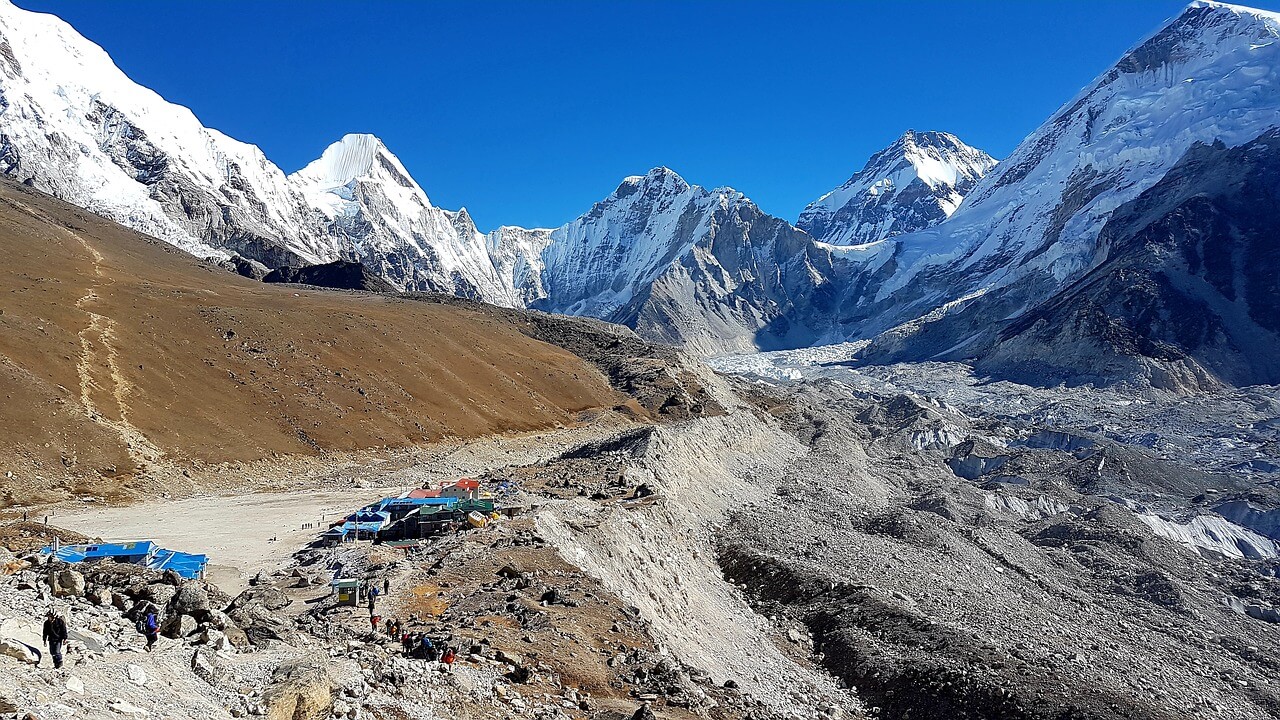
If you have a few additional days, you can combine Gokyo Ri Trek with the Everest Base Camp. Crossing the Cho La Pass over the Gokyo valley, the route of Gokyo connects with Everest Base Camp.
This trek is slightly technical compared to most of the treks in Nepal. It takes you through two of the best viewpoints in the Everest region — Gokyo Ri and Kala Patthar. It takes 14 days to complete the entire trek.
| Day | Itinerary | Altitude from (Meter) | Altitude to (Meter) | Trekking Duration |
|---|---|---|---|---|
| 1 | Fly to Lukla (2,800m) and Trek to Phakding | 1,400 | 2,652 | 3-4 hrs |
| 2 | Trek from Phakding to Namche Bazaar | 2,652 | 3,440 | 5-6 hrs |
| 3 | Acclimatization Day at Namche Bazaar | 3,440 | 3,440 | – |
| 4 | Trek from Namche Bazaar to Dole | 3,440 | 3,680 | 5-6 hrs |
| 5 | Trek from Dole to Machhermo | 3,680 | 4,470 | 4 hrs |
| 6 | Trek from Machhermo to Gokyo Valley | 4,470 | 4,800 | 4 hrs |
| 7 | Hike to Gokyo Ri and Trek to Thagnak | 4,800 | 4,700 | 4 hrs |
| 8 | Trek from Thagnak to Cho Dzongla via Chola Pass (5,360m) | 4,700 | 4,843 | 7-8 hrs |
| 9 | Trek from Cho Dzongla to Lobuche | 4,843 | 4,930 | 2-3 hrs |
| 10 | Trek from Lobuche to Gorak Shep with an excursion to Everest Base Camp (5,364m) | 4,930 | 5,170 | 7-8 hrs |
| 11 | Hike to Kala Patthar and trek to Pheriche | 5,170 | 4,250 | 7-8 hrs |
| 12 | Trek from Pheriche to Namche Bazaar | 4,250 | 3,440 | 7 hrs |
| 13 | Trek from Namche Bazaar to Lukla | 3,440 | 2,800 | 7-8 hrs |
| 14 | Fly from Lukla to Kathmandu | 2,800 | 1,400 | 40 mins |
Gokyo Ri with Renjo La Pass
Instead of retracing the same route back to Namche Bazaar, you can cross over Renjo La Pass, west to Gokyo valley and finally descend to Namche Bazaar via Thame. This trail is remote and far less trodden in the Khumbu region.
Traveling via this itinerary means you’ll have the opportunity to cross one of the significant high passes of the Everest region at Renjo La Pass.
| Day | Itinerary | Altitude from (Meter) | Altitude to (Meter) | Trekking Duration |
|---|---|---|---|---|
| 1 | Fly to Lukla (2,800m) and Trek to Phakding | 1,400 | 2,652 | 3-4 hrs |
| 2 | Trek from Phakding to Namche Bazaar | 2,652 | 3,440 | 5-6 hrs |
| 3 | Acclimatization Day at Namche Bazaar | 3,440 | 3,440 | – |
| 4 | Trek from Namche Bazaar to Dole | 3,440 | 3,680 | 5-6 hrs |
| 5 | Trek from Dole to Machhermo | 3,680 | 4,470 | 4 hrs |
| 6 | Trek from Machhermo to Gokyo Valley | 4,470 | 4,800 | 4 hrs |
| 7 | Excursion to Gokyo Ri (5,357m) and back to Gokyo Valley | 4,800 | 4,800 | 4 hrs |
| 8 | Cross the Renjo La Pass (5,435m) and Trek to Lungden | 4,800 | 4,350 | 6-7 hrs |
| 9 | Trek from Lungden to Thame | 4,350 | 3,850 | 4-5 hrs |
| 10 | Trek from Thame to Namche Bazaar | 3,850 | 3,440 | 4 hrs |
| 11 | Trek from Namche Bazaar to Lukla | 3,440 | 2,800 | 7-8 hrs |
| 12 | Fly from Lukla to Kathmandu | 2,800 | 1,400 | 40 mins |
Jiri to Gokyo Trek
Starting the trek from Jiri is the oldest route option to the Everest region. This adventure begins with a 7, 8-hour drive from Kathmandu to Jiri and connects to the trail of Gokyo Ri at Phakding village. It takes EIGHT days on foot to reach Phakding from Jiri.
This trek starts from the lowlands of the Solu region at 1,950 meters at Jiri to the highlands of Khumbu region, all the way up to 5,357 meters at Gokyo Ri. The trail passes through enchanting forests, countrysides, and several monasteries en-route to Phakding.
| Day | Itinerary | Altitude from (Meter) | Altitude to (Meter) | Trekking Duration |
|---|---|---|---|---|
| 1 | Drive from Kathmandu to Jiri | 1,400 | 1,950 | 7-8 hrs |
| 2 | Trek from Jiri to Shivalaya | 1,950 | 1,810 | 5-6 hrs |
| 3 | Trek from Shivalaya to Bhandar | 1,810 | 2,150 | 5 hrs |
| 4 | Trek from Bhandar to Sete | 2,150 | 2,575 | 6 hrs |
| 5 | Trek from Sete to Junbesi | 2,575 | 2,675 | 6-7 hrs |
| 6 | Trek from Junbesi to Nunthala | 2,675 | 2,440 | 6-7 hrs |
| 7 | Trek from Nunthala to Khari Khola | 2,440 | 2,070 | 5-6 hrs |
| 8 | Trek from Khari Khola to Pujyan | 2,070 | 2,720 | 6-7 hrs |
| 9 | Trek from Pujyan to Phakding | 2,720 | 2,640 | 5-6 hrs |
| 10 | Trek from Phakding to Namche Bazaar | 2,640 | 3,440 | 4 hrs |
| 11 | Acclimatization Day at Namche Bazaar | 3,440 | 3,440 | – |
| 12 | Trek from Namche Bazaar to Phortse Tenga | 3,440 | 3,680 | 5-6 hrs |
| 13 | Trek from Phortse Tenga to Machhermo | 3,680 | 4,470 | 5-6 hrs |
| 14 | Trek from Machhermo to Gokyo Valley | 4,470 | 4,800 | 4 hrs |
| 15 | Excursion to Gokyo Ri (5,357m) and back to Gokyo Valley | 4,800 | 4,800 | 4 hrs |
| 16 | Trek from Gokyo Valley to Phortse | 4,800 | 3,810 | 6-7 hrs |
| 17 | Trek from Phortse to Namche Bazaar | 3,810 | 3,440 | 5-6 hrs |
| 18 | Trek from Namche Bazaar to Lukla | 3,440 | 2,800 | 7-8 hrs |
| 19 | Fly from Lukla to Kathmandu | 2,800 | 1,400 | 40 mins |
Best Time to Trek Gokyo Ri
Autumn (September to November) and Spring (March to May) is by far the most favorable time to trek in Nepal, and Gokyo Ri Trek is no exception. Weather conditions in Autumn and Spring are moderately warm and stable; excellent for trekking. The skies also tend to stay clear in these seasons, offering the breathtaking spectacles of the mountains.
During the Autumn season, the average temperature of Nepal ranges from 16 to 24 degrees Celsius. Similarly, in Spring, the average temperature ranges from 15 to 23 degrees Celsius in Nepal.
During the Winter (December to February) season, snow covers the trail massively. In extreme conditions, excessive snow may even block the route. If you travel in late February or early March, the turquoise lakes of Gokyo can be completely frozen. However, the trail in the winter season can be tricky and challenging to walk.
Unlike most of the treks in Nepal, Gokyo Ri is not a year-long trekking destination. During the Monsoon (June to August), the trails are wet and slippery, so it is not advisable to trek during this period of the year.
Here’s a table with average temperature and rainfall details throughout the year for locations en-route to Gokyo Ri:
| Location | Elevation (meters) | Average Minimum Temperature (°C) | Average Maximum Temperature (°C) | Annual Rainfall (mm) |
|---|---|---|---|---|
| Kathmandu | 1,400 | 10.1 | 23.6 | 1505 |
| Lukla | 2,800 | 2.8 | 14.7 | 1838 |
| Phakding | 2,652 | 3.9 | 15.6 | 2011 |
| Namche | 3,440 | -0.8 | 11.7 | 1110 |
| Gokyo | 4,800 | -8.7 | 6.8 | 433 |
Gokyo Ri Trek Difficulty
Gokyo Ri Trek is moderate in difficulty, without any requirement of technical skills. For this particular itinerary, the entire trek takes 10 days of walking from Lukla to Gokyo Ri and back.
You’ll have to walk 5 to 6 hours daily on average in the trek. Although this route is less traveled compared to Everest Base Camp, the trail is easily navigable with signposts throughout the trek.
Altitude is the most significant factor that you need to consider while trekking to Gokyo Ri. You’ll spend a few nights above 4,000m on this trek. It means the possibility of suffering from Acute Mountain Sickness (AMS) is higher. Therefore, it is highly advisable not to rush while walking on the upper reaches of the trek and stay cautious regarding the elevation.
Another factor you need to keep in mind on this trek is the weather. The weather in the mountains is unpredictable and likely to change. Therefore, we recommend you to prepare for the harsh weather. Even during Autumn or Spring, though rainfalls and cold weather are less of a concern, always carry a waterproof jacket, sleeping bag, and a down jacket to avoid the risks of bad weather.
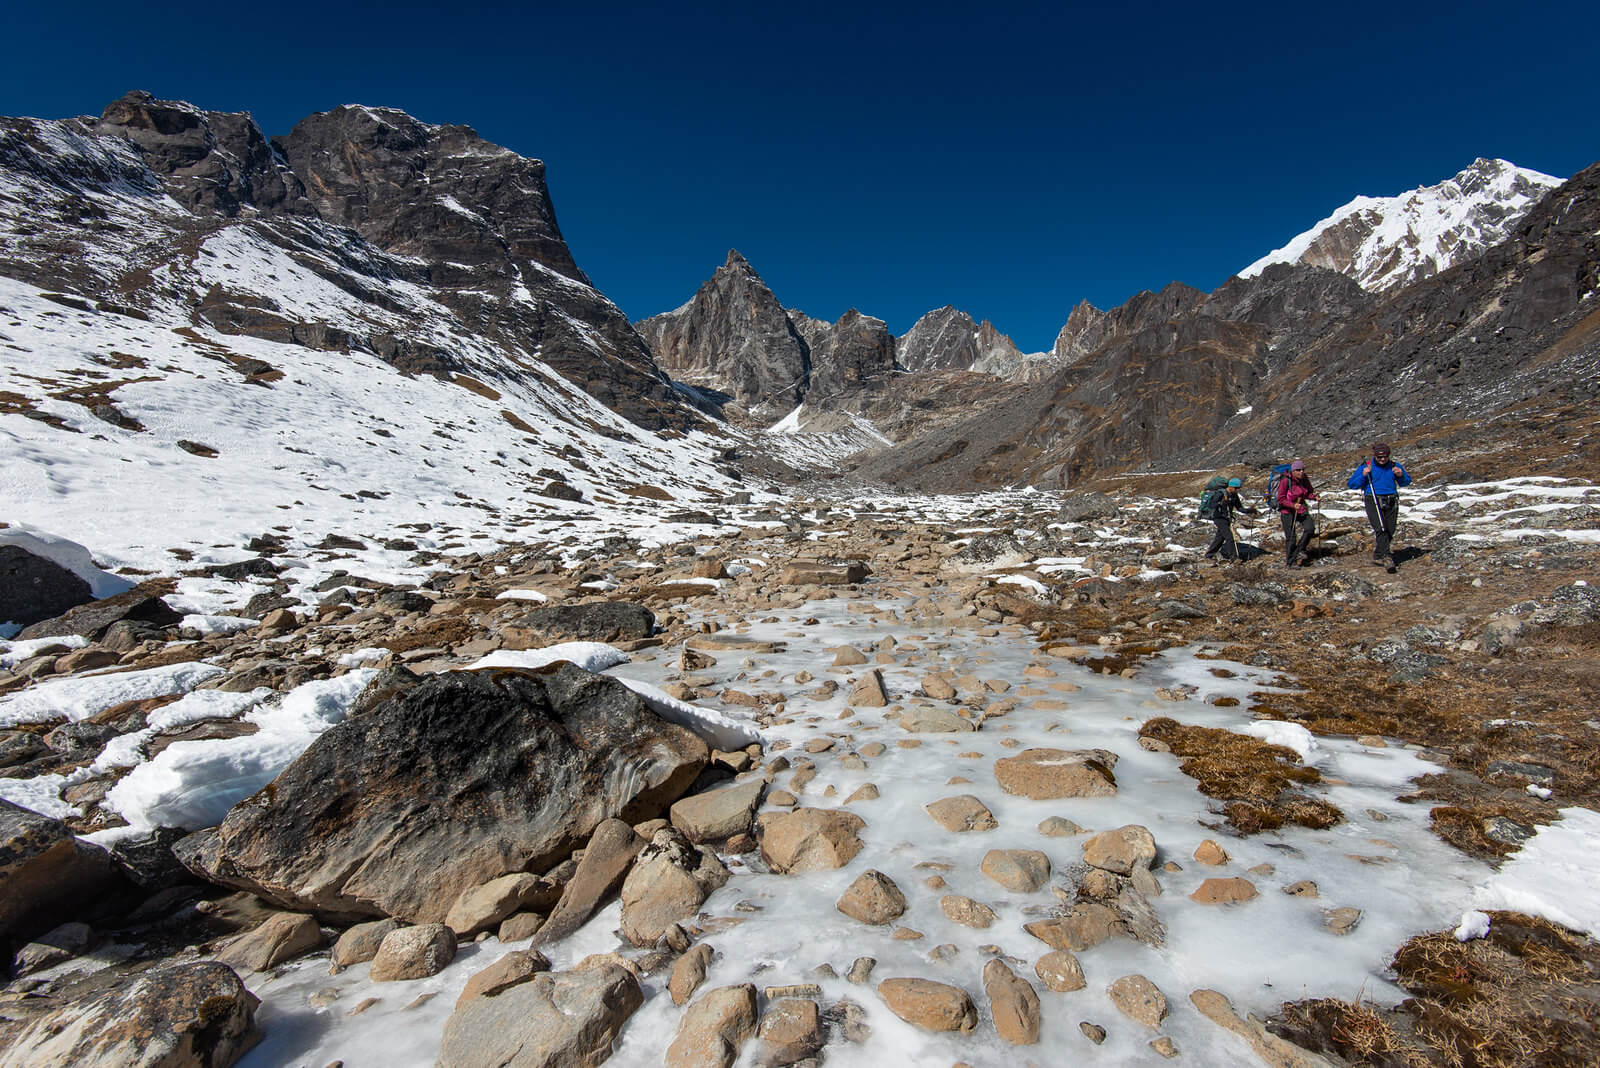
Although Gokyo Ri Trek is considered a moderate walk, it requires you to walk through steep uphills and downhills in the rough terrains of the Himalayas. Some of the trails in higher reaches are quite demanding. So, you must tackle these routes with proper preparations and decent physical fitness. Engage in cardio-oriented exercises like hiking, jogging, cycling, and swimming to prepare for the trek.
Gokyo Ri Trek Permit
Since October 2018, the local government of the Khumbu region has imposed a new permit, replacing the TIMS Card. So, while trekking in the Khumbu region, you no longer require TIMS Card; instead, you need to acquire Khumbu Pasang Lhamu Rural Municipality Permit.
You cannot get this permit in Kathmandu. You can only acquire this permit from either Lukla or Monjo. The cost of Khumbu Pasang Lhamu Rural Municipality Permit is about US$ 18 per person.
Additionally, you need to hold the national park permit to enter the Sagarmatha National Park. You can get this permit either from Nepal Tourism Board in Kathmandu or directly from Monjo. The cost of Sagarmatha National Park Permit is US$ 27 per person.
If you want to embark on the Gokyo Ri Trek from the classic Jiri route, you also need to obtain Gaurishankar Conservation Area Project Permit (GCAP). The cost of the permit is US$ 27 per person and is available at Nepal Tourism Board, Kathmandu.
Remember, all the permit fees are payable in Nepalese currency only. So, make sure to exchange all your cash to local rupees before trekking in this region.
| Required Permits | Cost |
|---|---|
| Khumbu Pasang Lhamu Rural Municipality Permit | NPR. 2,000/ US$18 |
| Sagarmatha National Park Permit | NPR. 3,000/US$ 27 |
| Gaurishankar Conservation Area Project Permit | NPR. 3,000/US$ 27 |
Insurance for the Trek
When it comes to trekking in the high Himalayas of Nepal, safety should always be a top priority of the travelers. Although Gokyo Ri Trek is considered as moderately challenging as of the experienced trekkers, it is not so easy as morning walks. At times, this trek goes hugely strenuous.
Additionally, the high altitude is always a threat. Even the most experienced trekkers can suffer from high altitude sickness. Therefore, proper travel insurance is essential while trekking in this region. Make sure to get a policy that comprises all the necessary charges, including helicopter evacuations, medical fees, trip cancellation, natural disasters, accidents, and even theft.
If you’re looking to buy proper travel insurance for Gokyo Ri Trek, we recommend you to buy it from World Nomads.
Guided VS Independent Trek
Independent Trek
The trails of Gokyo Ri is easily navigable as the entire trail is well-marked with signposts. Therefore, it is possible to trek here independently without hiring any guide and porter. If you choose to travel by yourself, you’ll have the flexibility of changing the plans as per your preference.
If you opt for trekking during the peak seasons, many travelers will accompany you throughout the trail. However, trekking independently means you’ll have to take care of all the hassles, including your backpacks, transportation, permits, and accommodations.
Pros:
- Trekking independently is much cheaper than a guided trek.
- You’ll have the luxury to adjust your itineraries and plans as per your will.
- If you’re into photography, you can take as much time as you want to capture the picture-perfect sceneries.
- Traveling without a guide means more adventure and fun as you’ll be dealing with all the logistics.
Cons:
- Trekking in high elevation on your own can be risky, as the situations can be unforeseeable in the Himalayas.
- At times, handling all the logistics by yourself can be hectic.
- In case you get into any trouble, you will not have anyone to assist you on the trail.
Guided Trek
While trekking above 5,000 meters, it is more advisable to travel with a licensed guide. If you choose to go on a guided trip, the guide will be responsible for arranging the accommodations, permits, and transportation.
On a guided trek, the guide handles all the logistics but in turn, restricts a certain amount of freedom to travel. But in case you get into any unforeseeable situations, the guide will assist you the entire time.
Pros:
- It saves you an abundance of time and energy for planning the entire trip.
- Having a guide in the mountains is comfortable and safe.
- You’ll get the in-depth knowledge of the destination while trekking with a guide.
- In case of difficult situations, they provide experienced assistance.
Cons:
- Hiring a guide is more expensive.
- With guides assisting you throughout the trek, guided trips are slightly less adventurous.
- You’ll be bound to follow the itinerary as per the guide.
Accommodation and Food
Like elsewhere in the Khumbu region, most of the teahouses in Gokyo Ri Trek are relatively comfortable and well-developed. From cheap hotels with necessary amenities to luxurious hotels with hot showers and electric blankets, there are plenty of teahouses in Gokyo Ri.
Most of the teahouses, although not luxurious, will provide the necessary facilities like rooms, food, charging facilities, WiFi, and a hot shower. The rooms offer twin beds, a thin mattress, a cushion, and a pair of bedsheets. Attached bathrooms are not available in most of the teahouses. Keep in mind that if you want to use amenities like WiFi, charging facilities, and a hot shower, the teahouse will charge you extra money for it!
The teahouses of Gokyo Ri serve both Nepali foods as well as western cuisines on their menu. Although the food choices are limited, the portion of the meal is quite substantial. Dal Bhat is the most preferred meal in the Himalayas along with pancakes, Tibetan bread, and soups. They also serve tea and coffee to keep you warm.
Gokyo Ri Trek Cost
On average, the total cost of the trek is around US$ 1,500 to 2,000 per person. Keep in mind, the value of the trek may vary depending upon various factors like mode of transportation, route, and number of days.
If you are planning to travel independently, the cost of the trek decrease to US$ 500-1,000 per person.
Here’s the cost breakdown of the services just in case you’re planning to go backpacking in Gokyo Ri Trek instead of the guided trek:
| Services | Cost |
|---|---|
| Khumbu Pasang Lhamu Rural Municipality Permit | US$ 18 per person |
| Sagarmatha National Park Permit | US$ 27 per person |
| Lukla Flight | US$ 150-180 per person |
| Helicopter | US$ 500-600 per person |
| Jeep | US$ 150-300 (6-7 person) |
| Local Bus | US$ 10-12 per person |
| Teahouses | Basic – US$ 3-5 per night Luxury – US$ 500-600 per night |
| Meals | Lower Region – US$ 2-3 per meal Upper Region – US$ 20-30 per meal |
| Trekking Guide | US$ 20-25 per day |
| Porter | US$ 15-20 per day |
| Porter – Guide | US$ 20-25 per day |
| Hot Shower | US$ 2-3 |
| WiFi | US$ 2 per hour |
| Charging | US$ 2-5 per hour |
Packing List for Gokyo Ri Trek
If you’re planning to trek to Gokyo Ri, here is the list of essential gears you need to pack:
Bags:
- Duffel Bag – If you’re planning to join a guided trek with porters who will help you carry your stuff, bring an 80-90L duffle bag.
- Daypack – Bring a lightweight daypack to carry your essential belongings.
- Backpack – If your trekking independently, a waterproof bag is a must. A 45-65L bag is highly advisable.
Clothing:
- Trekking Shirt – Carry 4-5 breathable trekking shirts. Make sure to balance both half and full sleeves.
- Trekking Trousers – Pack a couple of wind-resistant trekking pants and a pair of shorts.
- Thermal Layer – Pack a pair of a thermal layer to keep you warm in the evenings and at night.
- Fleece Jacket – Carry ONE light-weight fleece jacket to keep you warm in the lower region.
- Down Jacket – A warm down jacket to stay protected from extreme weather in the upper reaches of the trek.
- Waterproof Shell Jacket – Pack a high-quality waterproof jacket for wet weather.
- Breathable Underwear – Carry 5-6 pairs of comfortable and breathable underwear.
Footwears:
- Hiking Boots
- Trainers/Sandals
- Hiking Socks
- Thermal Socks
- Gaiter (For Winter)
Head Wears:
- Sun Protection Hat
- Beanie
- Buff/Neck Gaiter
Hand Wear:
- Inner Gloves
- Outer Gloves.
Important Accessories:
- Sleeping Bag
- Trekking Poles
- Water Bottle
- Basic Medical Kits
- UV Protection Sunglasses
- Headlamp
- Water Purification Tablets
- Hand Sanitizers
- Sunscreen/Lip Balm
- Toiletries
- Trekking Towels
- Camera
- Portable Chargers
Network Information
The network coverage in Gokyo Ri Trek is average. Both Ncell and NTC services are available throughout the trek. However, the network connection stays unstable, especially in the higher regions.
Most of the teahouses in Gokyo Ri Trek offer WiFi services, but they’ll charge you extra bucks for the service. WiFi connection may not be reliable to communicate with your friends and family.
Mobile data works decently in the lower region of the trek. At Namche Bazaar, you can expect 4G connection, but once you trek further than the town, the internet connection gets weaker. You can buy Ncell data packages usable up to Namche Bazaar.
Once you go beyond Namche, we highly recommend you to buy Everest Link WiFi. Everest Link is the wireless internet facility available in most of the main areas of the Khumbu region. It is cheap and most reliable ways to stay connected while on this trek.
Useful Tips for Gokyo Ri Trek
- Since there are no ATMs after Namche Bazaar, carry enough cash for the trek.
- Make sure to carry a sleeping bag.
- Bring a universal travel adaptor as the charging sockets in the teahouses may not pair with your charger.
- It is also convenient to carry a portable charger on the trek.
- Before heading off to the Himalayas, engage in cardio-related exercises to stay physically fit.
- Carry a DSLR camera, so you can capture the mesmerizing views of the mountains.
- Bring a warm down jacket to keep you warm during the night and a hardshell jacket to stay protected from the rain.
Accommodation in Kathmandu
| Budget Hotels | Mid-Range Hotels | Luxury Hotels |
|---|---|---|
| WanderThirst Hostel | Nepal Cottage Resort | Dwarikas Hotel |
| Andes House | The Fern Residency | Hyatt Regency |
| Hotel Trekkers Home | Hotel Vaishali | Kathmandu Guest House by KGH Group |
| Zen Bed and Breakfast | Shambaling Boutique Hotel | Hotel Shanker |
| Mitra Garden Inn | DOM Himalaya Hotel | Hotel Yak & Yeti |
Recommended Travel Agencies
Recommended Books and Guidebooks
- Everest: A Trekker’s Guide
- Lonely Planet – Trekking in the Nepal Himalaya
- The Rough Guide to Nepal
- The Climb
- Into Thin Air
- High Adventure
FAQs
1. How fit do I need to go trekking in Gokyo Ri?
While trekking above 4,500m, you need to be in excellent health condition and decent body shape. Your fitness level should be good enough to walk for a minimum of 5-6 hours per day. In some days, the trek can be quite challenging with a steep climb. So, engage in cardio exercises a month before the trek to keep your body fit.
2. Can I do Gokyo Ri Trek without a guide?
Yes! You can do Gokyo Ri Trek independently without hiring a guide. The route is navigable with occasional signposts along the trail. However, we highly recommend you to hire a guide, considering the elevation of the trek.
3. Is drinking water safe on the trek?
Bottled water is available to buy throughout the trek. However, we suggest you carry a water bottle and fill the water in the teahouses instead. Don’t forget to pack a water purifier or tablet to treat it.
4. What is the standard of the accommodation on the trek?
Most of the teahouses in Gokyo Ri Trek are standard that generally provide shared rooms, food, and basic amenities. The beds are usually comfortable. But, it is advisable to carry a decent sleeping bag to keep you warm during the night.
5. Is there any possibility of Acute Mountain Sickness?
Acute Mountain Sickness (AMS) generally occurs above the elevation of 3,500 meters. Standing at the height of 5,357 meters, Gokyo Ri marks as the highest elevation point on this trek.
Even the most experienced trekkers can suffer from high altitude sickness. Therefore, be aware and keep your body hydrated with plenty of water and fluids to prevent AMS.
6. Do I need travel insurance for Gokyo Ri Trek?
Definitely! It is mandatory to have travel insurance while trekking in such high altitudes. Make sure your travel insurance includes all the medical charges, helicopter evacuation, theft, accidents, and natural disasters.
Conclusion
Gokyo Ri Trek is the best alternative trek to the classic Everest Base Camp. This 11-day itinerary offers abundant diversity from breathtaking mountain scenery to high-altitude turquoise lakes to the massive Ngozumpa glacier.
Although this trek is considered moderate in difficulty, there are some challenging sections, especially in the higher reaches of the trek. So, physical fitness and mental preparation are essential while trekking in this region.